Showing posts with label Holiday. Show all posts

11/6/14

Slow Cooker Mashed Potatoes


If you are like me, no matter the size of your kitchen, when Thanksgiving rolls around, it never seems big enough. There are never enough cooking surfaces, oven space or counter space to fit all of the dishes you are hoping to serve piping hot, at the same time for your Thanksgiving feast.
So many dishes, so little space.
Enter the humble and oft forgotten slow cooker. Dump the potatoes in,  add a little water and salt. and in about 4 hours. BAM. You're in business.


It really is that simple.
Amazing.
Why didn't I think of this years ago??
Why doesn't my keypad have multiple emojis so I can insert the - bewildered, embarrassed, and now totally happy emoji  face parade??!! I'm sure you can picture those faces.
Happy days are here again my friends.
One less dish to keep warm on the stove or in the oven!
Happy cooking.
Here's a fantastic gravy recipe to go with your mashed potatoes- Simple Pan Gravy
PS are you following on INSTAGRAM? Look to the right, see the icon?  If not, do it. now. You'll be glad you did. Next week, I'm partnering with Harmons and 4 other bloggers to bring you original recipes for a delicious holiday meal AND  a big giveaway just in time for your multiple trips to the grocery store!


Slow Cooker Mashed Potatoes
A Bountiful Kitchen
print recipe

5 lbs red potatoes, scrubbed, cut into fourths (I leave the peels on)
3/4 cup water
2 teaspoons salt
1/2- 3/4 cup butter, cut into tablespoons
half and half, about 1 1/2 -2 cups
1 cup sour cream (optional)
pepper and more salt if needed

Place potatoes in large 6-7 quart slow cooker or crock pot. Pour in water. Sprinkle salt over potatoes.
Place lid on slow cooker and set on high heat. Don't lift the lid! Cook for about 4 hours.
Leaving the insert (bowl) in the slowcooker do the following:
Do not drain the potatoes. Place the butter in with the potatoes. Using a potato masher, mash the potatoes and butter together.  Add the half and half (about 1 1/2 cups). Continue to mash until desired consistency. Add the remaining 1/2 cup of half and half,  if needed.  Add sour cream (if using) and mix well. Taste and add more salt and a little pepper if desired.
Turn the heat to warm and keep warm until ready to serve for up to two hours. If needed, just before serving, add additional milk or half and half and fold the potatoes

Tips:
-Do not over mix, or beat the potatoes for a long time with a mixer. The potatoes will  take on a gluey type texture.  It is almost impossible to over mix the potatoes with a potato masher.  If you don't have one,  I highly recommend buying one.  I've had mine for at least 25-30 years,  and it's still going strong.
Click on the photo below to order yours for just a few dollars:


11/4/14

Our Favorite Pumpkin Pie


Notice how this pie edge is different from the one above?
I was in a hurry when I made this pie, so I just pressed the edge of the dough down
with a fork and called it good


For years, I made pumpkin pie that turned out a bit runny in the center.  No matter how long I baked the pie, it was still WET, not set.  One year, I set out to solve the problem once and for all. We live at a high altitude (about 4400 feet) so I'm sure that has something to do with the not completely set-up center of my pumpkin pies.


Do you like the P I E letters? My dear friend Mel,  lover of all things PIE,
made these for me last year for my birthday


I like the flavor of the Libby's Pumpkin Pie recipe, found on the back of the Libby's can of pumpkin. Yes,  I've tried fresh pumpkin- cooked, but like the texture, flavor and color of Libby's better.  I found after several adjustments to their recipe, this one works time and time again. No jiggly middle. Just a nice bite of lightly spiced pumpkin filling in every bite.
Everyone needs a good pumpkin pie in their repertoire of holiday favorites. This is my tried and true, never fail recipe. Hope you love it.
Happy baking!


Our Favorite Pumpkin Pie
A Bountiful Kitchen
print recipe

1 1/2 cups granulated sugar
1 teaspoon salt
1 tablespoon pumpkin pie spice, OR  2 teaspoons cinnamon, 1 teaspoon ground ginger, 1/2 teaspoon ground cloves*
4 large eggs
1 29 oz can pure pumpkin (NOT pumpkin pie filling)
20 oz evaporated milk (canned)
1 teaspoon vanilla
2 unbaked pie crusts* (4 cup volume each)

Place oven rack on bottom third of oven and turn oven to 425 degrees.
Mix sugar, salt, pumpkin pie spice and eggs together in large bowl for about 2 minutes, or until blended well. Add pumpkin, mix well until smooth and incorporated. Add canned milk and vanilla. Make sure all ingredients are mixed together well.
Pour into two 9- inch prepared pie crusts.
Place in oven and bake for 15 minutes at 425 degrees, then without opening oven door, reduce temperature to 350 degrees and bake for an additional 40 minutes.
The pies are done when the middle is set and no longer looks wet. you may insert a knife in the center of one pie. If the pie is done, it will come out clean.
Let cool completely before serving. May be made the day before serving.
Refrigerate if not serving the same day.
Yield two- 9 inch pies

Tips:
-You may make your own pumpkin pie spice for pennies using my recipe on this page.
-Use the extra evaporated milk in your mashed potatoes.
-The best and most simple pie crust in the world may be found here.
-Make sure to have whipping cream on hand. To make a nice swirled pile of fresh whipped cream atop your pies, spoon the whipped cream into a large ziplock bag and snip off a corner. When ready to serve, pipe the cream on top of the pie. Serve immediately.


6/27/14

Red, White and Blueberry Tart


Are you planning a 4th of July bash?
This is one of my favorite desserts, reinvented. Remember when fruit pizza was all the rage years ago? Sweet cookie crust, with cream cheese and powdered sugar icing, topped with fruit and glaze. Sometimes the fruit was arranged beautifully, other times it was dumped on top of the crust and cream cheese layer. That was the 80's. Time to update this classic dessert! You'll love my Red, White and Blueberry Tart.


First, I headed to Harmons to buy the sweetest, most plump, fresh berries. If you live in Utah, you're in business!  Harmons consistently has the best produce in the state. With the exception of picking berries yourself, Harmons is as fresh as it gets.


How do you update a classic? I decided switching from a pizza pan to tart pans made a big difference in presentation. Other subtle, but game changing differences- a little lemon flavoring, fresh fruit only (nothing canned) and no sugary glaze.
When you break this dessert down, it's a sugar cookie crust, lemon-cream cheese icing, topped with fresh fruit. So simple, a kid can make it.
I know you're going to love this for your summer gatherings!
Happy Fourth, and happy baking :)


Red, White and Blueberry Tart
A Bountiful Kitchen

1 cup butter, softened
1 cup + 2 tablespoons powdered sugar
2 teaspoons lemon flavoring or lemon emulsion*
1 egg
2 1/2 cups flour
2 teaspoons baking soda
2 teaspoons cream of tartar
Individual tart pans or 9-10 inch tart pans

Cream together butter and powdered sugar in a large bowl. Add the lemon flavoring or emulsion and egg, beat until combined and smooth, about 1 minute.
Add the flour, baking soda and cream of tartar all at once. Mix just until flour disappears and wet and dry ingredients are combined,
Using individual tart pans (14-16  4-inch pans), or
2-3  9-10 inch or equivalent tart pans, lightly grease the pans with cooking spray.
Scoop the dough into the pans, and press into the pans lightly with hands.
If the dough gets too soft, place the dough in the refrigerator for a few minutes to help the dough firm up.
After all of the tart pans are filled, pre-heat oven to 375 and set the racks in the middle of oven.
When oven is pre heated, bake the tarts for about 10-12 minutes or until tarts are golden brown. For a
9-inch tart pan, bake about 15 minutes. Remove and set on rack to cool. Let cool completely. This step may be done up to two days ahead if kept covered after baked and cooled.

Lemon Cream Cheese Filling:
12 oz cream cheese, room temperature (1 1/2  8 oz blocks cream cheese)
1 3/4 cups powdered sugar
2-3 tablespoons fresh lemon juice
dash of salt
splash of milk (if needed to thin)

Beat all of the filling ingredients together in a large bowl until smooth and blended well. The filling should be the consistency of  frosting.
Set aside in refrigerator until ready to use. If making ahead, refrigerate and cover.  Remove from refrigerator  about 30 minutes before ready to use.

Fruit topping:
fresh blueberries
fresh strawberries
fresh raspberries

Wash and drain the fruit thoroughly before using on the tarts. If the fruit is still wet from washing, it may bleed onto the cream cheese filling. I usually wash the fruit, let sit in a colander, then place on paper towels and pat lightly.

When ready to assemble:
Spread the cream cheese filling onto the tarts using a small spatula. Spread the filling almost to the edge of the tart. Arrange the fruit on top of the filling. Place tarts in the refrigerator until ready to serve.
May be prepared early in the day and covered until ready to serve.

Tips:
-Lemon emulsion and lemon extract are found in  most bakery supply stores or stores that sell cake decorating supplies.  Do not use lemon juice as a substitute in the tart shell. Fresh lemon juice is called for in the lemon cream cheese filling only.


5/22/14

Sour Cream and Bacon Potato Salad


Are you looking for a new potato salad to serve at your Memorial Day barbecue? I have a favorite tried-and-true potato salad  that I love, but thought it would be fun to put a new twist on our family favorite. Most Memorial celebrations include a barbecue. What barbecue is complete without a good potato salad? It's kind of like serving apple pie without ice cream. Not happening here.
Sour Cream and Bacon Potato Salad  tastes like a loaded baked potato, served cold.  It's creamy and filled with things you love in a good old fashioned potato salad, with a few extras like sour cream, bacon and fresh parsley.
My first bite to taste-test ended up morphing into an entire plate of potato salad for dinner. I couldn't put the fork down.
I'm guessing you'll love it too.


Sour Cream and Bacon Potato Salad
A Bountiful Kitchen
print recipe

5 lb bag of red potatoes
6 hard boiled eggs, peeled
1/2 lb bacon, cooked crisp and diced, divided
1/2 cup flat leaf parsley, chopped
1 1/2 cups sour cream (light is fine)
1 1/2 cups mayo
3 tablespoons Spicy Brown Mustard
3-4 drops hot pepper sauce
salt and pepper

Wash potatoes and place in a large pan. Fill pan with enough water to cover potatoes by about one inch. Boil on high for about 30-40 minutes, or until potato is soft and knife is easily inserted into potato. Drain water from pan and let potatoes sit for a minute to cool.
While potatoes are still hot, quarter or cube potatoes and place in large bowl.
Salt the potatoes generously.
Chop one egg and set aside for garnish.  Reserve a few tablespoons of chopped bacon and a bit of parsley, also for garnish.
Quarter the remaining 5 boiled eggs, and add to the potatoes in the bowl. Add the parsley and remaining chopped bacon and toss all ingredients lightly.
Whisk the sour cream, mayo, spicy brown mustard and hot pepper sauce in a bowl and add to the potato mixture. Taste the salad and add more mayo or sour cream, depending on how creamy you like your salad.
Heap into a serving bowl and garnish with the reserved chopped egg, bacon and parsley. Refrigerate until ready to serve, or serve immediately at room temperature.
Serves 10-12 as a side dish

Tips:
-I don't peel the potatoes before boiling. Peel after the potatoes are cooked. I always leave some of the peel attached.
-I used regular sour cream. Low fat sour cream will also work in this dish.
-After the initial mixing of the sour cream and mayo with the potatoes, the potatoes will absorb some of the moisture. I always add a bit more either sour cream or mayo before serving. Wait to place the final garnish on the salad until just before serving.
-I use French's brand Spicy Brown Mustard.
-If you really want to truly mimic the flavor of a loaded baked potato, add some grated cheese as well. I would only do this as a garnish to the top of the salad so the cheese doesn't get soggy.


5/8/14

Strawberries and Cream Sheet Cake


Strawberry Shortcake is one of my all time favorite desserts. I mean, what mom doesn't love Strawberry Shortcake? This cake takes the dessert to a new level. Fresh strawberries, cream, cream cheese...it doesn't get much better than this. And it's easy to mix up. Make the cake on Saturday, and the frosting on Sunday.
Trust me.
Mom's going to love this.


Strawberries and Cream Sheet Cake
adapted from Southern Living Magazine
print recipe

1 cup butter, softened
2 cups sugar
2 large eggs
2 teaspoons fresh lemon juice
1 teaspoon vanilla extract
2 1/2 cups cake flour
2 tablespoons strawberry-flavored gelatin (powder)
1/2 teaspoon baking soda
1/4 teaspoon table salt
1 cup buttermilk
2/3 cup chopped fresh strawberries
Shortening
Parchment paper
Vegetable cooking spray

Preheat oven to 350°.
Beat butter at medium speed with an electric mixer until creamy; add sugar, beating until light and fluffy. Add eggs, 1 at a time, beating until blended after each addition. Beat in lemon juice and vanilla.
Stir together flour and next 3 ingredients; add flour mixture to butter mixture alternately with buttermilk, beginning and ending with flour mixture. Beat at low speed just until blended. Stir in strawberries.
Line a 9x13 with parchment paper. Grease and flour the paper before spreading the batter onto the paper, allowing 2 to 3 inches to extend over long sides.
Bake at 350° for 30 minutes or until a wooden pick inserted in center comes out clean. Cool in pan on a wire rack 30 minutes. Lift cake from pan, using parchment paper sides as handles. Invert cake onto wire rack; gently remove parchment paper. Or just lift cake from pan and frost after cooled.  Cool completely (about 1 hour). Spread Strawberry Frosting on top and  sides (optional) of cake.
Fresh Strawberry Cream Frosting

1 cup heavy cream
1/4 cup powdered sugar

1 (8-oz.) package cream cheese, softened
1 1/2 -2  cups powdered sugar
dash of salt
1/2 cup chopped fresh strawberries

In a deep bowl, beat cream until stiff, add 1/4 cup powdered sugar. Beat until stiff peaks form. Scrape out of bowl and set aside in another small bowl. 
Using  the same large bowl, beat cream cheese until smooth. Add powdered sugar a little at a time. Add a dash of salt.  Beat again until smooth. Add 1/2 cup fresh chopped strawberries. Mix just until fruit is incorporated.  Fold the whipped cream mixture and the cream cheese mixtures together. Frost the cake immediately. Refrigerate until ready to serve. 

Tips:
-I altered the ingredients in the frosting to create a more stable frosting. The Southern Living version calls for granulated sugar and fresh lemon juice, which produces a delicious frosting, but does not hold its shape well. This frosting is delicate and should be served within two hours of frosting. 
-My Sister in Law, Sheri made this and followed the SL directions exactly, except she baked the cake in a jelly roll pan. The recipe calls for baking in a 9x13. After trying the cakes baked in a 9x13 and a jelly roll pan, I liked the cake baked in the jelly roll pan a bit better. 

-Be careful to not over bake. The cake is done when a few moist crumbs are attached to a toothpick when testing.

5/5/14

Pork Tenderloin with Sesame Ginger Glaze and Warm Cabbage Slaw


Here's a main dish for your Mother's Day meal that is guaranteed to make Mom feel like a queen and make you her favorite child!
Don't be intimidated by the length of the recipe. It's really simple, with a few steps that can be done ahead (also make sure to read all of the tips below the recipe before heading to grocery store):
-On Saturday, make the marinade and place the meat in a bag to marinate.
-Prepare all of the ingredients for the cabbage slaw by cutting up the veggies and set in the fridge.
-Make the Tarragon Mayo to dress the slaw and refrigerate.
On Sunday all you have to do is cook the pork and steam the cabbage.


This photo is the pork tenderloin after it has been seared and cooked in the oven. This will hold in the moisture and allow the pork to cook for a few more minutes. My sister in law, Sheri always cooks her pork and then wraps it in foil. I love the way her pork is always tender and juicy.
Dry pork? It's not going to happen if you use this method.
Mom's going to be asking you for this recipe.
Count on it.
Come back on Thursday, I'll post a simple and delicious dessert for Mom :)


Three simple steps for the warm cabbage slaw.  Chop.
Cover and steam for 5 minutes.
Toss with vinegar.
That's it.
Serve warm or room temperature. 

This one is drizzled with a little tarragon mayo...if you think Mom will like dressing that's a little creamy


Pork Tenderloin with Sesame Ginger Glaze and Warm Cabbage Slaw
A Bountiful Kitchen
print recipe

2 1/2 lb Pork Tenderloin
1/2 cup balsamic port vinegar ( I used "O" brand), regular balsamic is fine
1/2 cup soy sauce
1/2 cup olive oil
4 tablespoons sesame oil
4 tablespoons grated fresh ginger
2 shallot, peeled and chopped (about 1/2 cup)
salt and pepper
olive oil for searing meat

Place the pork tenderloin in a gallon Ziplock bag. Whisk all of the ingredients together in a bowl and pour  3/4 cup of the marinade over the pork. Squish the pork around in the bag to make sure has covered all areas of the pork.  Reserve the remaining (about 3/4 cup)  marinade to make a reduction after the pork is cooked. Do not put the reserve marinade on the pork. Set aside remaining marinade.
Marinate the pork for at least 2 and up to 24 hours in refrigerator.
This is a good time to wash and cut up the cabbage and carrots for the warm slaw to be served with the pork.
Preheat oven to 425, with rack on top third of oven.
When the pork is done being marinated, Turn the heat on the stove to medium high heat. Place a tablespoon  or two of olive oil into the pan after the pan is hot.
Remove the meat from the marinade and season the meat generously with salt and pepper. Let any excess marinade drip off the meat before searing, so you won't get splattered by the hot oil/liquid reaction. Discard marinade.
Using tongs, carefully sear the meat on all sides for about 2 minutes per side. When the meat is browned on all sides, remove from pan with tongs and set on a baking sheet.
Cook for 15-18  minutes at 425.  Do not over cook. Remove meat from oven, and immediately wrap meat in Saran or other plastic wrap tightly. Set aside.
Make the reduction:
Take the remaining reserved marinade (that was not used with meat) and place in the same pan used to sear the meat, do not wipe out pan.  Heat over medium high heat until boiling. Simmer for about one minute. Add water if too thick (1-2 tablespoons). Remove from heat.

Warm Cabbage Slaw with Tarragon Mayo
2 cups green cabbage, washed and sliced thin
2 cups purple cabbage, washed and sliced thin
2 cups dark leafy greens, such as: spinach, kale or mustard greens
2 large carrots, or 1 1/2 cups baby carrots, sliced into thin pieces,
or 1/2 bag of matchstick carrots
1/2 cup water
2-3 tablespoons white balsamic or cider vinegar
salt and pepper

Tarragon  Mayo (optional, but yummy)
1/2 cup mayo, regular or low fat
1/4 cup fresh, or 2 tablespoons dry tarragon
2 tablespoons green onion
1 tablespoon vinegar
salt and pepper

Use a wok or large fry pan to cook the slaw. Place the cabbage and carrots in the pan with the water. Turn the heat on high and bring water to a boil. Cover and cook the vegetables for about 5 minutes, or until the cabbage is slightly wilted. Remove from heat. Toss with salt and pepper and vinegar. Keep lid on until ready to serve.
Whisk together all ingredients to make tarragon mayo. Serve drizzled on top of cabbage slaw or (I like it) on the side.

When ready to serve dinner:
Remove the meat from plastic wrap. Place on cutting board and slice into 3/4-1 inch thick medallions. Place the meat on a serving platter and pour the sauce over the meat. Serve with warm cabbage slaw and tarragon mayo.

Serves 8

Tips:
**Very Important**-
Buy the right kind of pork. This is Pork Tenderloin.  The package is long and skinny. Pork Tenderloin is often confused with Pork Loin. Do not buy Pork Loin roast.  It's usually a fat (shaped) roast. It doesn't work well with this cooking method.  I can't tell you how many times a friend has called and said they are ready to make a recipe that calls for Pork Tenderloin, but instead have purchased Pork Loin roast. Oops. Check the name of the cut of meat carefully. Remember, the package is long and skinny. You may purchase Pork Tenderloin at any grocery store or at Costco in a two-pack. If you purchase in a two pack, usually one side of the package will weigh about 2 1/2 lbs. or enough for a single recipe above. If you double the recipe, I would 1 1/2 times the sauce. You won't need two times the sauce/marinade.
- If you are following instructions for make ahead (above in the post) remove the meat from the fridge about an hour before cooking, and let sit on counter in bag.
-Make sure the oven is preheated for at least 10 minutes before cooking the pork. You want the oven to be all the way up to temperature.
-Wrapping the meat: Use plastic wrap. This adds an extra measure of trapping the juice in, and next to the meat. If you are waiting more than about 10 minutes to serve dinner after the pork is cooked, try wrapping in foil over the plastic wrap as well to keep it warm. One more note about wrapping the meat in plastic wrap. I watched a chef from the Grand America Hotel in action last year at a fund raising dinner. He wrapped the pork roast he cooked in plastic wrap. If it's good enough for the Grand, it's good enough for me :)
-Don't over cook the meat. it will continue to cook after removed from oven while wrapped in plastic wrap. 


5/1/14

Kale, Radish and Roasted Corn Salad with Parmesan Crisps- Mother's Day 2014 Menu


Hi friends.
Today is  the first recipe in our 2014 Mother's Day Menu.
Get excited.
Have you ever been to Red Butte Cafe in SLC?
Last  summer I went to Red Butte for lunch and ordered the salad of the day. The server promised I'd love it. He was right. I'm not usually a raw kale fan. When I asked the server why the kale was so tender he told me the chef actually massages the greens. Uh. What? Massaging the produce? He claimed that massaging the kale leaves breaks down the fibers, therefore producing a more tender leaf in the salad.  I took some notes from my new found friend and server, and was determined to create my own version of this salad at home.
Because the greens are so firm, the salad keeps well in the fridge and it's perfect for make-ahead. You can make this on Saturday and serve it on Mother's Day. Just re-toss, and add a little more dressing if needed, and top with a few Parmesan crisps.
Mom is going to love it.


Kale, Radish and Roasted Corn Salad with Parmesan Crisps
A Bountiful Kitchen

Salad:
5-7 oz kale, washed, dried (I used a little over 1/2 of a 10 oz bag)
1 bunch, or about 5-7 medium sized radishes
1 large ear fresh corn or about 1 1/2 cups frozen corn
1 cup grated Parmesan cheese, or more if you would like to have a few extra chips

Dressing:
1 cup canola oil
1/4 cup cider vinegar
2 tablespoons fresh lemon juice
1-2 clove of garlic, minced
1-2 teaspoons sugar (to taste)
1 teaspoon salt
1 teaspoon pepper

To make the dressing:
Mix all dressing ingredients with a blender or immersion blender. Taste and add more salt, pepper or sugar as needed. Set aside. Note- you will not use all of the dressing on this salad.

To make the salad:
Wash the radishes, trim off the ends, slice thin. 
Cut the corn off of the cob. Spread on a cookie sheet and drizzle with 1 tablespoon of olive oil. Salt and pepper generously. Roast at 450 degrees for 10 minutes. Let cool. 
Place the kale in a medium size bowl and add about 1/3 cup of the dressing. You may use food handlers gloves for the next step. Work the dressing into the salad with your hands (give the kale a good massage :) This takes about 2 minutes.  Add the radishes and corn when you are finished massaging the dressing into the kale. 

To make the Parmesan crisps:
Heat a pan over medium high heat.  Do not grease the pan. Place piles of grated Parmesan cheese on the hot pan or griddle until the cheese melts and begins to brown on the bottom. Flip to the other side and cook until golden on the opposite side. When cooked to light golden brown on both sides, remove and let cool in single layer on a cooling rack or cookie sheet. 

To assemble the salad:
Add more dressing to the kale mixture if needed. Toss. Add Parmesan chips just before serving. 

Serves 8 as a side salad

Tips:
-This is a very simple salad. If you roast the corn while making the Parmesan crisps, you will be able to put this salad together in about 20 minutes (or less).
-The dressing is one of my favorites, it goes well on several different types of salad and would make an excellent dressing for any pasta and vegetable salad. 


4/18/14

Lemon Lime Sprig Cookie


What are you having for dessert with your Easter dinner? 
Do not say jelly beans. Or Cadbury eggs. 
You had those for breakfast. And lunch.
Have you made ABK's  (Almost) Swig Cookies? Or my chocolate version of the Almost Swig, The "Swagg Cookie" ? If so, you are an old pro at making this type of cookie.
Last week, my SIL, Diane asked me about a dessert suggestion for a dinner she was having with a Mexican-theme menu.  I suggested she try adding some lime or lemon to the Swig recipe for a sweet that would compliment her meal. Then I experimented at home. I tried putting lemon and lime in the frosting, but didn't love the way the frosting looked with flecks of green. So I grated a bit of lime zest  in the cookie dough, then made a  fresh lemon-sour cream frosting to top off the cookie.


Make sure to use fresh lemon juice in the frosting. The difference between bottled lemon juice and fresh squeezed in this recipe is kind of like the difference between a can of orange flavored juice and a glass of fresh squeezed OJ.
I know you're going to love this cookie.
Taste tester comments ranged from "OMG WHAT IS IN THAT COOKIE??!!!!!!" to "Best cookie I've ever eaten".
Get busy.
Happy Easter weekend, friends. 


Lemon Lime Sprig Cookie
A Bountiful Kitchen
print recipe

dough:
1/2 cup butter
!/2 cup shortening ( I use butter flavored Crisco)
1 cup sour cream
zest from one to two limes, grated fine
1 1/2 cup granulated sugar
1 teaspoon almond extract (or vanilla)
4 1/2 cups all purpose flour
1 teaspoon baking powder
1 teaspoon salt
sugar  for top of cookies

frosting:
1/2 cup butter, room temperature
2 tablespoon sour cream
4 cups powdered sugar
3 tablespoons fresh lemon juice
zest from one lemon, grated fine
dash of salt
1 drop lemon food coloring
1-2 tablespoons milk**

Preheat oven to 325 convection or 350 regular bake.
Take butter out of refrigerator and microwave for about 15 seconds. Place butter, shortening, cold sour cream and lime zest in a mixing bowl. Mix for about one minute. Add sugar and almond or vanilla flavoring, mix until smooth. Add all dry ingredients at once. Mix just until flour disappears and the mixture comes together in a ball of dough, about 1-2 minutes on very low speed. 
Spray the cookie scoop with a little cooking spray. Scoop the dough onto a cookie sheet. I use either a 1 3/4 inch or a 2 inch scoop. A two inch scoop will produce a cookie similar in size to the Swig cookie. If you don't have a cookie scoop, roll the dough into a ball about the size of a golf ball. 
Place about 1/4 cup sugar into a small bowl. 
Flatten the cookies with the bottom of a glass dipped in sugar (press the bottom of the glass against the cookie first, then dip it in the sugar so the sugar will stick) . Press the cookies so they are flattened a bit, twisting the glass as you press to produce a jagged edge. 
Bake in oven for about 10-12 minutes or until edges are lightly golden and cookies are slightly firm to the touch. Remove from oven, let cool. Place the cookies in the fridge and chill. 
Prepare the frosting:
Beat together the butter, sour cream, powdered sugar, lemon juice, zest and salt. When all ingredients are incorporated, add the drop of food coloring and milk if the frosting needs to be thinned. 
Frost after the cookies are completely chilled. 
Makes about 18  large cookies.

Tips:
-If you want the cookies to taste more like the Swig cookies make this adjustment to the dough:
 omit the almond flavoring and reduce the sugar to 1 cup. I prefer the cookies to be a bit sweeter, so I liked 1 1/2 cup of sugar in the dough.
-I use a microplane grater to grate the zest.
-The Swig cookie is frosted with quite a thin layer of frosting. I prefer my frosting to be a bit thicker. If you want to frost the cookie with a thinner frosting, add about 3-4 tablespoons of milk to the frosting.
-This cookie stays quite well in the fridge for two weeks  if kept in an air tight container. I almost always have a cookie sheet filled with these in my fridge for emergencies :)  They taste as good after two weeks as they do on the day they are made.


4/16/14

ABK's Classic Deviled Eggs


What's an Easter feast without a deviled egg?
Everyone loves deviled eggs, especially on Easter Sunday.
Here are a few secrets I've gathered from trial and error about making classic deviled eggs.
Rule #1 Don't overcook the egg. Follow the method below for perfect boiled eggs.
Grate, instead of smash the yolks with a fork. You'll get a smoother filling overall.
Don't add too much mayo, or the filling won't set up and the end result will be a not-so-pretty egg.


Fill the egg with a bag. Use a decorating tip, the same as if decorating a cake. Your eggs will look like they were filled by a professional, vs a 3 year old.

This photo sequence was taken by Grant, who is currently working on his
food photography skills. Bless his heart.

Even though this recipe looks complicated, it's not. I added lots of tips to make it easier for you. Because I love you.
And I want your deviled eggs to stand up to the scrutiny of your mother in law.
It doesn't get more simple than this:
One bowl.
One beater.
One bag.
One tip for the bag.
Get busy.


ABK's Classic Deviled Eggs
A Bountiful Kitchen
print recipe

one dozen large eggs, preferably a few days old
1/2 to 3/4 cup mayo ( not low fat) I like Best Foods or Hellman's
2 teaspoons yellow mustard
salt and white pepper to taste
paprika, for top of eggs, optional
pastry or plastic bag and 1 large star tip

Carefully place the eggs in a pan large enough to hold all of the eggs. Cover with cold water about 2 inches above the eggs. Heat over medium high heat until the water boils. Boil for about 1 minute. Remove pan from heat, cover and let sit for 10-12 minutes. Rinse eggs with cold water, until eggs are cool enough to handle.  Drain water, crack the eggs and remove all shells. Discard shells. Unless you are Martha, and are making a craft for a centerpiece out of egg shells.
After peeling, cut the eggs in half with a sharp knife.
Gently scoop out the yolk into a deep bowl. You will want a large, deep bowl so when the yolks are beaten, they don't spill over the edge of the bowl.
Place the whites on a platter, or dish to transport the eggs (see below).
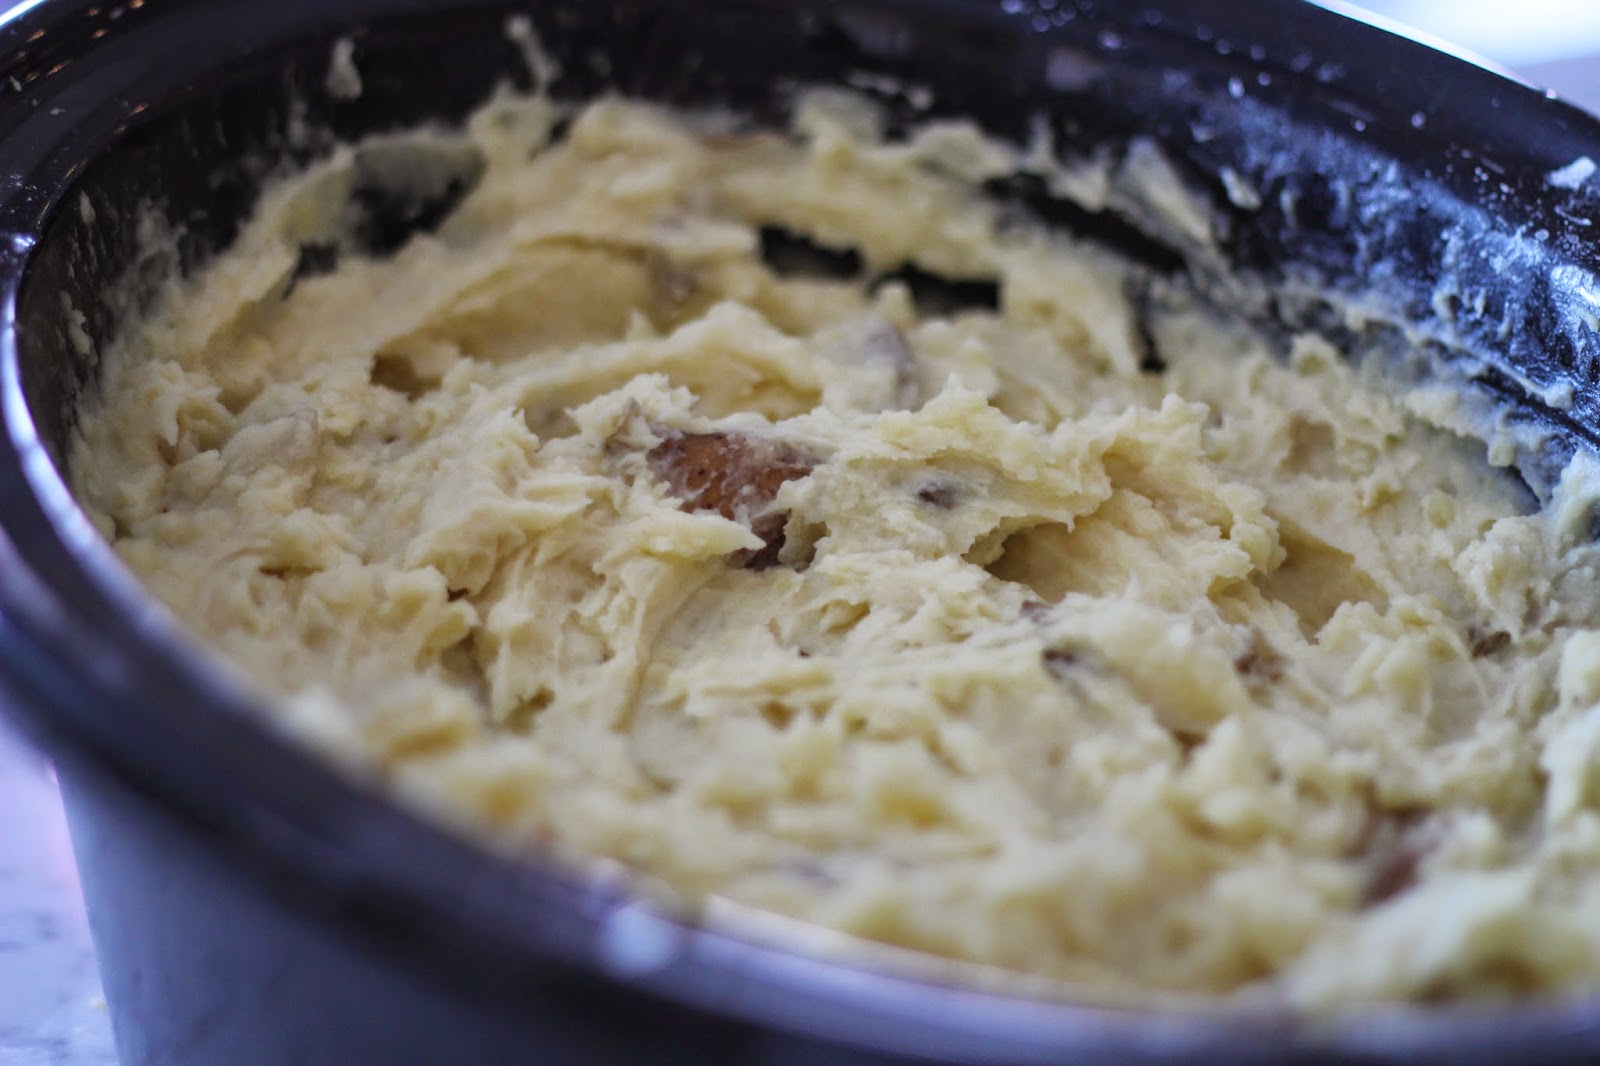
After all of the yolks have been removed, gently grate the egg yolks against the grate on a box grater. Add 1/2 cup of mayo, 2 teaspoons mustard, salt and pepper to the yolks. On low speed, beat the yolks just until smooth. If the yolks are not creamy enough, add additional mayo a little at a time, until the mixture will adhere to a spoon, but not fall off the spoon if turned upside down. If the mixture is too runny, it will not sit up well in the egg white. Taste the filling and add more salt and pepper if necessary.
Fit the end of the plastic bag with a star tip. Cut the end of the plastic bag off, so the end of the tip is exposed. Roll the end of the bag to the outside, so the inside of the bag is exposed as much as possible, making the bag easier to fill. Use a large spoon and fill the bag with the egg yolk mixture, Spooning the filling into the bottom of the bag. When finished, unroll the edges of the bag and fold the bag down and let any extra air out of the bag, so the filling is ready to be squeezed out of the bottom of the bag.
Using a swirling motion, fill the eggs with the yolk mixture. Repeat until all of the filling is gone. Sometimes, I have an extra white, or two.
Sprinkle with paprika if you like.
Serve or refrigerate up to 24 hours before serving.

Tips, aka everything you ever wanted to know about deviled eggs, but were afraid to ask:
-For easiest peeling, it is best to use eggs that are a few days old.
-The size of the egg will determine if you use 1/2 or 3/4 cup of mayo, or possibly a tablespoon or two more than 3/4 cup. If you are purchasing extra large Costco type eggs, the eggs (and yolks) are usually much bigger than the extra large eggs purchased at the corner grocery.
-Grating the yolks, instead of smashing with a fork will give your deviled eggs a very smooth filling. I also used a beater to mix the ingredients after grating. Don't over mix, just enough to incorporate and get an even filling.
-Filling options. The options are endless. I'm into simplicity. My favorite egg salad sandwich has just mayo, egg and salt. So I love this recipe. You can add hot pepper sauce, vinegar, flavored mustard, sweet relish, chopped up anything, and lots of garnishes to top the egg. Just make sure it doesn't get too wet, or it won't sit up pretty when you go to fill the whites. And be sure the filling (chunks of desired filling) will still squeeze out of your pastry bag and tip .
-Where's the vinegar? Most recipes call for vinegar. I'm not a fan, so I leave it out. The mustard gives the filling a nice little bit of tart flavor, and I like the simplicity of yolk and mayo.
-Do not use a serrated edge knife to cut the eggs in half, or your eggs will not have a smooth edge when filled.
-White pepper is recommended, but black pepper is fine as well.
-When filling, use a disposable plastic pastry bag fitted with a decorative tip. I used a large star tip. Slide the tip into the bottom of the bag before filling, then snip off the end of the plastic bag. A Ziploc bag
works if you don't have or want to purchase pastry bags. Pastry bags and tips can be purchased at grocery, craft or kitchen specialty stores. I like the disposables, because they are easily tossed after using. They usually come in packages of 12. The tips are $1-2 each and may be used over and over.
-When transporting the eggs, use a sheet of parchment paper on the bottom of a dish. It will keep your eggs from sliding around. I put mine in a 9x13 plastic ware dish and snapped the lid on. See photo below.
-You can make this recipe the day before serving and hold them in the fridge. Just remove from fridge and serve when ready. They will look and taste the same the day after preparing.
-You've now earned one credit toward your Master Deviled Egg Chef degree. Congrats.

Eggs ready to transport without the slippery slide problem...