Showing posts with label chocolate. Show all posts

8/18/14

Tried and True Chocolate Chip Cookies (2014)


School starts up next week in our community. Is there anything better after a long day at school than a melt-in-your-mouth homemade chocolate chip cookie?
If you've ever made chocolate chip cookies, you've probably had a baking failure. Am I right?
Today, we are going to solve that problem. Once and for all.
NO MORE CHOCOLATE CHIP PANCAKE COOKIES.  Ever again.


In 2010, after months of testing methods and ingredient combinations for baking chocolate chip cookies, I came up with a recipe that works.  Every. Single. Time.
Since then, I've continued to update, simplify and improve this recipe. For the original recipe, with step by step photos, check out  this post.  This recipe is a one bowl, 20 minute (start to finish)  success.


I've made these cookies a few hundred times. Everyone- from young neighbor kids to folks in nursing homes love these cookies.
I know you're going to love them too.
Happy Baking!


ABK's Tried and True Chocolate Chip Cookies (updated 8/2014)
A Bountiful Kitchen (adapted from Nestle Toll House Cookie recipe)
print recipe

1 cup (2 sticks) unsalted butter, softened *
3/4 cup granulated sugar
3/4 cup packed light brown sugar
1 tablespoon vanilla extract
2 large eggs
2 3/4 cups all-purpose flour*
1 teaspoon baking soda
1 teaspoon salt ( I prefer coarse salt)
2 cups  or 1 (12-oz. pkg.) chocolate chips

Preheat oven to 375° F. If using convection, preheat to 375 as well.
For regular oven, place rack in middle of oven. When using a convection oven, you should be able to bake on all racks at one time.
Cut butter into pieces ( about 2 tablespoons each) and place in mixing bowl. I use a Kitchen Aid and power it on 2 (low).  After a few seconds, add granulated sugar, brown sugar and vanilla extract. Mix on low speed until creamy (this takes just a few seconds). Add eggs, beating just until incorporated and smooth.  Never turn the beaters on high. Using a spatula, scrape down the sides of the bowl and bottom of the bowl to insure all ingredients are incorporated.
Dump 2 cups of the flour, soda, salt and chocolate chips all together into bowl with butter mixture. Add the remaining 3/4 cup of flour to the top of this mixture. Slowly mix the dry ingredients and the chocolate chips together.  Do not over mix. Turn the dough with a rubber spatula so the bottom of the dough is mixed into the top of the dough. This will insure the flour is mixed in properly and the chips are distributed evenly.
Using a cookie scoop, drop onto un-greased baking sheets, or baking sheets lined with parchment paper. Place 6 scoops of dough on each baking sheet. Flatten slightly with the palm of your hand.
If using convection, bake for 7-10 minutes until golden brown. If using regular oven, bake at 375 for 10-12 minutes. Cookies should be slightly golden and the cookie should not be wet on top.
Cool on baking sheets completely.
Yield 18 large cookies.

Tips:
(or my mini-epistle on cc cookie making and baking)
-Only use butter. Unsalted is best. The butter should be more firm than room temperature butter. I take it straight out of the fridge, and microwave it for about 20 seconds.
-*Our altitude is about 4,400 ft. So, I use about 2 3/4 cups flour total. The original Toll House recipe calls for 2 1/4 cups. If you are at sea level, you will probably need less flour than the 2 3/4 cup.
-Don't over beat the butter-sugar mixture, or the batter will become too soft, and your cookies will not be beautiful and puffy. They will resemble pancakes. 
-Don't sift the flour.
-There is usually a notable difference between using a convection and a standard oven. If you bake at the same temperature, for the same amount of time, the convection cookie will be done, with a beautiful, golden, slightly crispy outer layer. Still soft on the inside. And it will be taller than the cookie baked in a standard oven. Not everyone has a convection oven- if you don't, you can still bake a great cookie using a standard oven!
-I think two of the biggest mistakes made while baking cookies are:
1-Over mixing. This will cause the batter have too much air incorporated, producing a fluffy, instead of a chewy cookie.
2- Over bakingUnder baking is good! Not under baked to the point the cookie is wet and doughy, but just until the top sets, and the dough looks like it has a bit of a crust.
-Chocolate chips - For semi sweet,  I use Nestle Semi Sweet chips. You can't go wrong here. But for Milk Chocolate, we prefer Guittard . The chips are called Maxi Chips and are sold in a silver colored bag.
-If the cookie spreads too much, or the edges are not even, I take a small spatula and push the edges inward to create a cookie that is round. This has to be done immediately after removing from the oven, or remove the pans half way through baking and push the sides in to form a circle. Place pan back in oven and finish baking. 
- High Altitude info: Not recommended-directions on Nestle Choc Chip package for high altitude- I have tried this variation, and don't like the result. The cookies aren't quite sweet enough, and have a crispy more cake like texture. Here are the directions on the package: (again I do NOT recommend using this method, but have printed it here as an FYI)  Increase flour to 2 1/2 cups. Add 2 teaspoons water with flour and reduce both granulated sugar and brown sugar to 2/3 cup each. Bake drop cookies for 8 to 10 minutes and pan cookie for 17 to 19 minutes.
-Last tip. Mound the cookie into a ball. I make them about the size of a golf ball. I use a cookie scoop, because it's easier for me. For years, I just used a spoon, and then shaped them by hand. Make sure to flatten the cookie just a bit before baking. To yield 18 cookies use a  2 1/4 inch scoop.


8/11/14

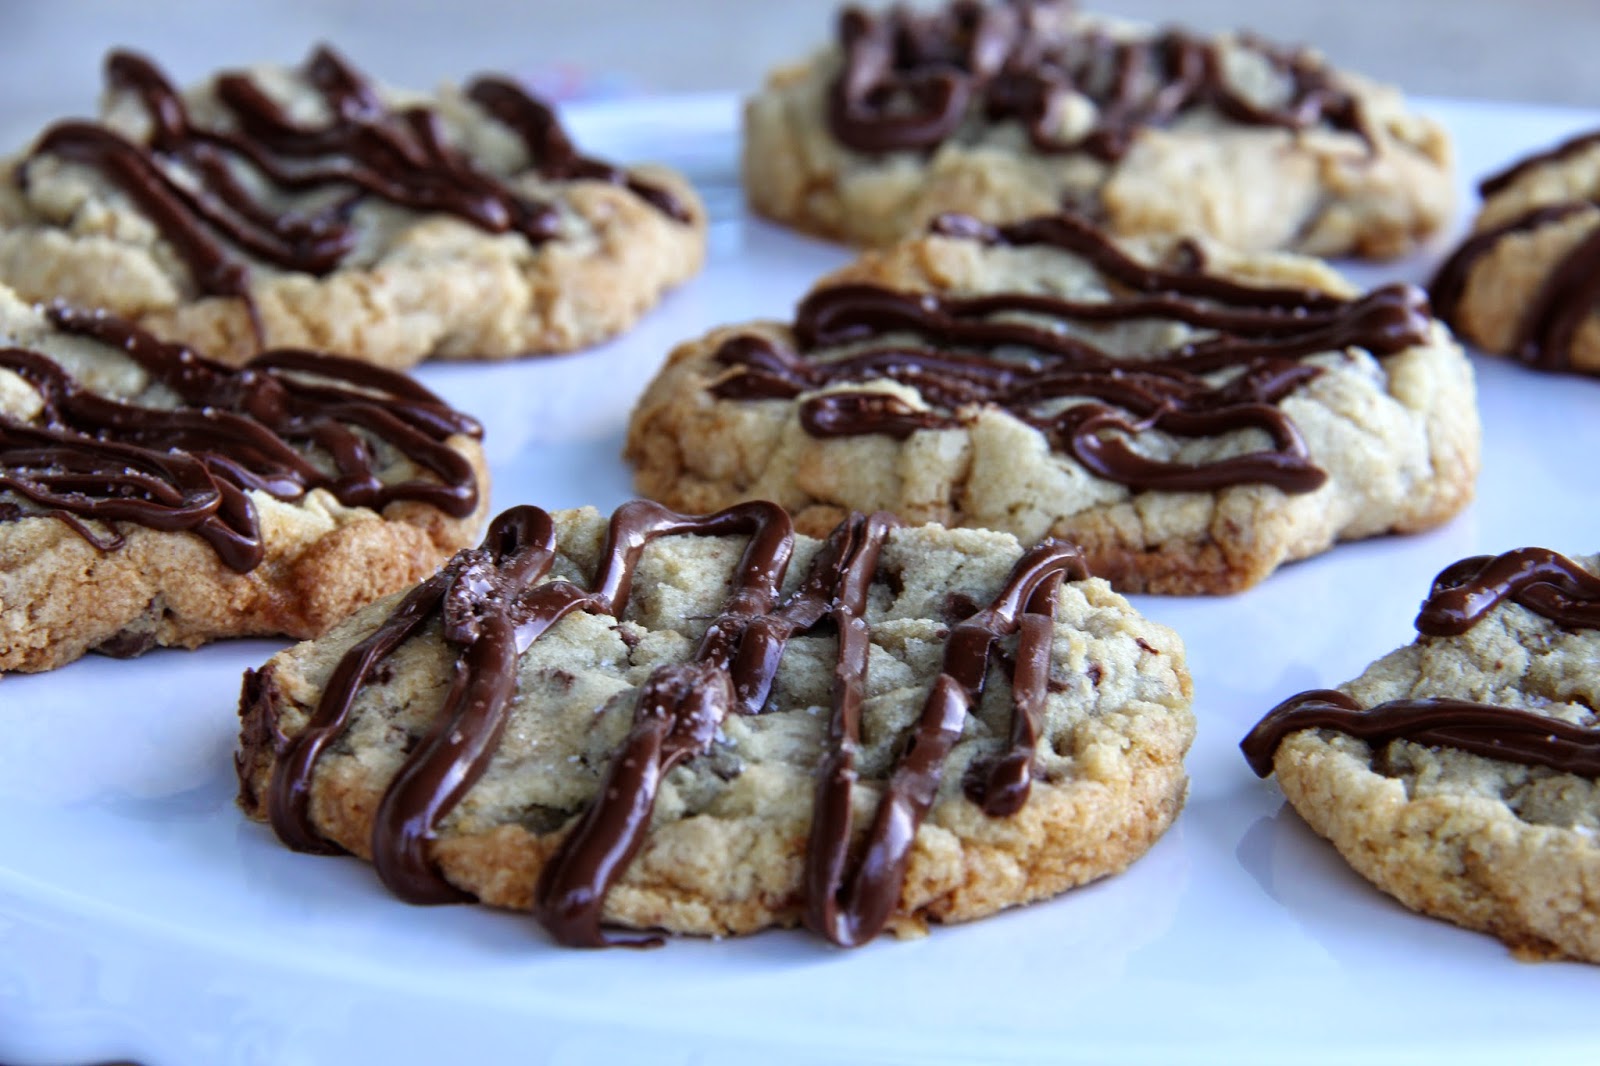
Toffee and Chocolate Chip Cookies with Salted Chocolate Drizzle


Are you a chocolate and toffee lover? Me too. As a kid, my mom loved Heath Bars.  She always had a stash hidden in the kitchen cupboard. I loved the thin piece of toffee dipped in chocolate.
A perfect marriage of sweet, chocolate, salt and toffee. How good would that be in a soft and chewy cookie?
So good you could eat the whole batch without sharing.
Notice I said could, not would.
From my kitchen to yours.
Happy baking.


scoop and place on cookie sheets.
flatten out just a bit with your palm, then place in oven.


this is one of my cookie baking secrets. right after they are
out of the oven, reshape the cookies if they are not perfectly round.
 push the edges inward with a small spatula to form a  neat circle.
The cookies have to be hot, or they won't be pliable. 
After the cookies are cooled, drizzle with chocolate


sprinkle with coarse sea salt while chocolate is still soft.
Like my SALT container?
try to not eat the whole batch.


Toffee and Chocolate Chip Cookies with Salted Chocolate Drizzle
A Bountiful Kitchen
print recipe

1 cup butter, slightly softened (microwaved for 20 seconds)
1 1/2 cups sugar
3/4 cup light brown sugar
2 eggs
2 teaspoons vanilla
2 3/4 cups flour
1 teaspoon baking soda
1 teaspoon coarse sea salt
1- 8 oz package Heath English Toffee Bits, Bits of Brickle  (sold next to chocolate chips)
1 1/2 cups semi sweet chocolate chips for cookies

topping:
1 1/2 cups semi sweet chocolate chips for drizzle
flaked or coarse salt

Preheat oven to 350 convection or 375 regular bake.
Cream butter and sugars using low speed on  mixer, just until smooth.  Do not over beat.
Add two eggs and vanilla. Mix just until incorporated and smooth, about 20 seconds.
Add flour, soda, salt, Heath Toffee Bits and 1 1/2 cups chocolate chips to mixing bowl. Mix just until flour disappears.
Scoop cookies onto cookie sheet, I used a 1 1/2 inch cookie scoop.
Place on parchment paper or lightly greased cookie sheet.
Bake for 10 minutes or just until golden.
Remove and let cool completely on cookie sheet.
After cooled completely, place the remaining 1 1/2 cups chocolate chips in a Ziploc bag. Microwave for about 30 seconds or until chocolate is softened and melted enough to drizzle.
Press the melted chocolate toward one corner of the bag. Squeeze out any excess air, fold down the top of the bag and snip a tiny corner of the bag off. Drizzle the chocolate over the cookies and sprinkle immediately with flake or coarse sea salt.
Let the cookies sit until the chocolate is set up.
Makes about 30 cookies.


2/26/14

Swagg Cookie


Another lesson today on Good, Better, Best  :)
Remember the (Almost) Swig Cookie recipe I posted last summer? If you haven't made it yet, you need to get busy. I've had dozens of people tell me they love to make the cookies at home, since they don't live close to the famous Swig cookie shacks. So how do you improve on a good thing?
One word.
Chocolate.


naked, before frosting ;)

I love the simplicity of the (Almost) Swig Cookie. It's easy to throw together, scoop, flatten and bake. Speaking to women here: you and I both know, there are times a sugar cookie won't fill our want  need. We need chocolate.
In the interest of making a good thing better, I played with my original recipe and made a few adjustments. After a couple of test batches, I came up with the (Almost) Chocolate Swig Cookie...but that's a mouthful, so I named it the Swagg Cookie. It's a little bit short-bready (technical ABK term) on the sugar coated edges, soft in the middle, lots of dark chocolate flavor, topped with a bit of creamy chocolate-sour cream frosting. If that's not swagg, I don't know what is.


Here's the deal.
Good:  Cookie from cookie stand :)
Better: (Almost) Swig Cookie, baked in your kitchen
Best:    Chocolate Swagg Cookie
You choose.


*updated 6/2014 to yield 18 large or 30-32 small cookies

Chocolate Swagg Cookies
A Bountiful Kitchen
print recipe

1/2 cup butter, room temperature
1/2 cup shortening, (butter flavor is best)
1 1/2 cups sugar
1 cup sour cream
2 teaspoon almond or vanilla flavoring ( I like almond)
3/4 cup plus 2 tablespoons unsweetened cocoa
3 1/2 cups flour
1 teaspoon baking powder
1 teaspoon salt

for shaping cookies:
1/4 cup granulated sugar
cooking spray
*glass with flat bottom, see notes below

Preheat oven to 350 or 325 on convection setting.
Cream butter, shortening and sugar together.
Add sour cream and almond flavoring. Mix. Add the cocoa and mix again until smooth. The mixture should be creamy, with no specks of white. Turn the mixer off.
Add the flour, baking powder and salt all at once. Mix just until all of the flour disappears, on the lowest setting. This should take about 20-30 seconds.
Using a 1 3/4 inch to 2 inch scoop, place the dough onto a lightly greased cookie sheet.
Lightly spray the bottom of a glass with cooking spray. First press the glass against a cookie, then dip the bottom of glass in sugar to flatten cookie a bit. Continue dipping the bottom of the glass into the sugar after flattening each cookie.
After all of the cookies are flattened a bit, go back and lightly sprinkle sugar on top of each cookie.
Bake for about 9-10 minutes at 325 convection, or about 10-12 minutes at 350.
The cookies should be barely firm on top. Do not over cook!
Let cool completely on cookie sheet. Frost when cool.
Yield about 18 large cookies or 30-32 small to medium cookies.

Sour Cream Chocolate Swagg Frosting
1/2 cup butter, room temperature
2 tablespoon sour cream
3 1/2  cups powdered sugar
2/3 cup cocoa, unsweetened
1 teaspoon vanilla
dash of salt
milk to thin, about 2-3 tablespoons

Cream butter, sour cream and powdered sugar. Add cocoa and vanilla, beat until smooth. Thin frosting with milk a  tablespoon at a time until desired consistency.

Tips:
-To achieve an edge on the cookie, or "lip" * :
1. Generously fill the cookie scoop, extra dough will help form an outer edge on the cookie.
2. Choose a glass with a flat bottom. Look at the bottom of the glass, if the bottom is not flat, the dough will not press out properly.
3. I use a 2 1/4 inch glass bottom for my smaller 1 3/4 inch cookie scoop; and a 2 3/4 inch glass bottom  when using a 2 inch cookie scoop .
4. Flatten the cookie ball with the bottom of the glass, twisting the glass gently as you flatten the dough ball. The dough should no longer be mounded. The cookie should be about 1/4 inch thick after flattening with glass.
-I use Dutch Process Cocoa, which I highly recommend for this cookie.
-This cookie will keep well refrigerated for a few days. Frost after cool, refrigerate in a single layer until the frosting is set, then stack in layers between parchment or wax paper, cover tightly.
-If you want to mail this cookie, I would add a cup of chocolate chips to the batter and use all butter flavor  shortening. It will stay fresh longer and travel better. Sprinkle generously with sugar on top and leave the frosting off of the cookie. Perfect for missionaries, college students or military care packages!
-Be very careful to not over bake this cookie. It will be slightly firm to the touch when done. Because the cookie is so dark in color, it cannot be judged by color when it is finished baking. See the photos at the top of the page for example of cookie after removing from oven, but before frosting.

1/23/14

Joyous Almond Cookies


Two experiences led me to creating my most favorite cookie in the world.
1. As a kid, one of my top 5 candy bars to collect at Halloween was the mini Almond Joy. When my brother and I spilled our stash on the living room floor after trick or treating, he gladly handed over his Almond Joy bars, in trade for my Snickers. I loved the sticky, sweet, coconut drenched in milk chocolate and topped with a single almond. Forget the Sweetarts!  I wanted nuts, coconut and chocolate.
2. After eating  (well, lets say it was more than one, less than 10)  coconut cookies at two local bakeries- Ruby Snap and Sweet Tooth Fairy,  I became obsessed with creating my own version of the coconut and chocolate cookies they sell.
After a few tries, I came up with my own Almond Joy bar, in a cookie.
If you love the Almond Joy, you'll love this cookie.
Promise.

 Hot out of the oven, before dipping…


Joyous Almond Cookies
A Bountiful Kitchen
print recipe

1 cup butter
1/2 cup brown sugar
1 cup white sugar
1 teaspoon almond flavoring
1 teaspoon coconut emulsion (or coconut flavoring)*
2 large eggs
2 1/2 cup flour
1 teaspoon baking soda
1 teaspoon salt
1 cup whole almonds, chopped coarse
1 1/2 cups coconut, sweetened, flaked
1 1/2 cups chocolate chips ( I like semi sweet)
2 Almond Joy bars, chopped into 4 pieces each

Dipping chocolate and additional coconut for outside of cookie

Preheat oven to 375. Or if using convection, 350.
Remove butter from refrigerator and softened butter for about 20 seconds in microwave or until slightly soft.  Place butter in mixing bowl and add brown and white sugar. Beat just until smooth. Add almond and coconut emulsion and eggs. Beat again just until smooth.
Add the remaining ingredients to the bowl, mix just until flour disappears and ingredient are incorporated. This takes less than one minute.
Scoop dough onto cookie sheets, I use a 2 inch scoop. Slightly flatten with palm of hand.
Bake at 350 for about 12 minutes, or until cookies are slightly golden. Convection bake for about 8 minutes.
Remove from oven and let cool completely.
Melt chocolate. Dip about 1/3 of the cookie in melted chocolate, set on cookie sheet lined with wax or parchment paper and sprinkle with additional coconut.
Allow cookies to cool completely.
Makes about 16-18 large cookies.

Tips:
-*Coconut emulsion is sold in most craft or cooking stores near the cake decorating supplies. It can also be found at discount stores such as Homegoods or TJMaxx. It can be interchanged in equal amounts 1 tsp of emulsion for 1 tsp of flavoring. Emulsion does not contain alcohol, and therefore does not cook out while baking - resulting in the intensity of flavor staying the same after baking.
-I like to use whole almonds and chop them either by hand with a sharp Butcher knife, or place them in a food processor with the blade setting and pulse until chopped coarse.
-you can interchange the chocolate on the inside and outside of the cookie, using either semi sweet or milk chocolate.


Dipped in milk chocolate...


12/23/13

Chocolate Pecan Pie


A few years ago one of my favorite people in the entire world (yes, the entire world) made this pie and brought it over to our house the night before Thanksgiving. Her name is Melanie. And she's the best.

That's my friend on the left. Always helping in the kitchen.
And my Brookie on the right. 

I have no idea why it took me three years to get around to making this recipe. It's now one of my favorites. Whenever someone asks me  "what is the easiest pie to make if I'm a beginner in the kitchen?" I always say pecan pie. It's one bowl- mix, dump and bake type of recipe.
If you have an assignment to make pies for Christmas, and you need to impress your new in-laws, this is your lucky day. Here's the scoop on this recipe:
1. super simple
2. tastes great
3. super simple
4. tastes great

Think chocolate, caramel, pecan in a pie crust. Best combo ever.


Chocolate Pecan Pie
adapted from Keep Your Fork-There's Pie!
print recipe

Prepare crust for a single crust pie. Pie crust recipe found here

3 tablespoons butter, softened
3/4 cup packed dark brown sugar
1/2 teaspoons salt
2 large eggs
1/2 cup light corn syrup
1 teaspoon vanilla
1 cups toasted pecans
1 cup semi sweet chocolate chips

Place rack on bottom third of oven. Preheat oven to 450 degrees.
Prepare crust as directed roll out and fill a single 9 inch pie plate.
Mix butter, brown sugar, salt, eggs, corn syrup and vanilla until smooth.
Fold in  pecans.
Sprinkle chocolate chips over bottom of pie crust. Pour filling on top of chocolate chips.
Place filled pie in pre heated oven. Bake for 10 minutes at 450 degrees.
After ten minutes, reduce heat to 375. Do not open oven door. Bake for an additional 45 minutes.
Remove from oven. Let cool for at least three hours before serving.
Serve with whipped cream or ice cream.

Tips:
-Do not use larger than a 9 inch pie plate.
-Take out all of the ingredients ahead of time and pre measure. This will insure you have the amounts right.  Last night a friend told me about a three time attempt at making a cream pie filling. First time, forgot the sugar, second time, doubled the milk, third time, no idea why but it didn't set up. If the ingredients would have been pre measured, she might have avoided the first two failed attempts. Lesson here, if you are forgetful (like me) or just starting out, pre measuring and placing all ingredients on counter will help you to avoid pitfalls such as realizing you don't have a key ingredient on hand or leaving a key ingredient out of a recipe :)
-Do not open the oven after you place the pie inside. If you bake the pie on the bottom third (usually the second rack from bottom) your crust should not over brown.
-When making a bottom crust for pecan pie, do not roll it too thin. The filling will caramelize and if it seeps through the bottom crust, it will stick and make the pie difficult to remove from the pie plate.


12/16/13

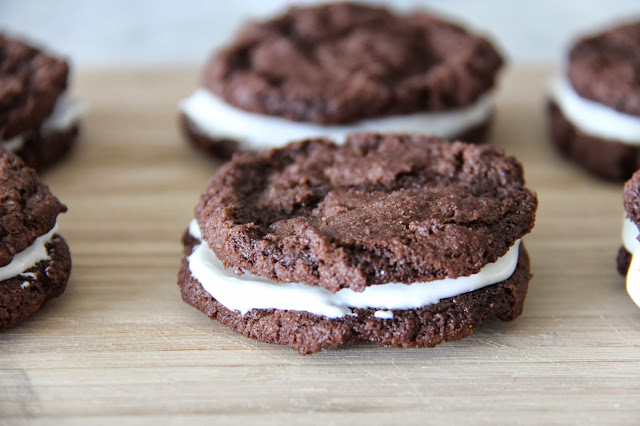
Homemade Oreos and ABK's 4th Annual Christmas Cookie Extravaganza


Fourth year in a row. Christmas cookie week  at ABK.
Day one. Homemade Oreos. I started with this recipe because I wanted to share an easy kid-friendly cookie. Christmas is steeped in tradition. Sometimes, we get into a rut with traditional baking.  We bake certain cookies because they have been handed down through generations. Those "I have to make these every year or it won't be Christmas" recipes. Lots of times they are loaded with nuts and fruits and who knows what else... My kids were never big on the fruit and nut cookies. After making Date Pinwheels (which I loved) for about 15 years, I noticed there were always lots of leftovers which I reluctantly tossed in the trash after January 1st.  I finally stopped making those lovely date cookies, and my kids have never peeped a word about the missing "must have" cookies.
I try to include a chocolate cookie in our Christmas baking each year, this year, it's the humble Homemade Oreo. Out with dates, in with chocolate.
Happy Baking.
Next up: Jolene's Linzer Cookies


Homemade Oreos
adapted from Sweet Potato Chronicles
print recipe

cookies:
1 1/4 cups all-purpose flour
1/2 cup unsweet­ened Dutch process cocoa
1 tea­spoon bak­ing soda
1/4 tea­spoon bak­ing pow­der
1/4 tea­spoon salt
1 cup sugar
1/2 cup plus 2 tablespoons room-temperature, unsalted but­ter
1 large egg

fill­ing:
1/4 cup room-temperature, unsalted but­ter
1/4 cup veg­etable short­en­ing
2 cups powdered sugar
1 tea­spoon vanilla extract

Pre­heat oven to 375°F.
In a food proces­sor, or bowl of an elec­tric mixer, thor­oughly mix the flour, cocoa, bak­ing soda and pow­der, salt, and sugar. While puls­ing, or on low speed, add the but­ter, and then the egg. Con­tinue pro­cess­ing or mix­ing until dough comes together in a mass.
Take rounded tea­spoons of bat­ter and place on a parch­ment paper-lined bak­ing sheet approx­i­mately two inches apart. I used a mini scooper to form the cookies. Make sure to follow directions here, or you'll end up with cookies that are way too big. With moist­ened hands, slightly flat­ten the dough. Bake for 9 min­utes, rotat­ing once for even bak­ing. Cool completely.
To make the cream filling,  place but­ter and short­en­ing in a mix­ing bowl, and at low speed, grad­u­ally beat in the sugar and vanilla. Turn the mixer on high and beat for 2 to 3 min­utes until fill­ing is light and fluffy.
To assem­ble the cook­ies spread a bit of the filling onto the bottom of the cookie (flat side).  You may use a pas­try bag with a 1/2 inch, round tip, to fill the cookies, but I think spreading the filling on works just as well.  Place another cookie, equal in size to the first, on top of the cream. Con­tinue until all of the cookies have been sand­wiched with cream. Store in a sealed container. 
Makes about 25-30 small (about 3 inch) cookies.

8/26/13

Banana Chocolate Chip Layer Cake


Don't you love a good celebration? I baked up this cake to celebrate ABK's five year bloggeversary! Whoot. Not really.
I mean, I did bake this cake, but not for the bloggeversary. Just Sunday dinner. Since we all were busy running around, cramming in every possible end-of-summer activity in August, I thought celebrating A Bountiful Kitchen's five year mark should wait until after Labor Day.
You won't want to miss it.
Next week.
Giveaway.
It involves a blender.
The. Very. Best. Blender.
You have to have a Pinterest account to enter the giveaway. We're having a little tutorial at the end of the week for those of you who haven't jumped on the Pinterest bandwagon. My oldest daughter, Corrine, who has her own blog  Mint Arrow  (finding the best deal on quality items, never paying full price-click on the link and check it out) is going to guest post on ABK and help you, if you are not yet  Pinterest addicted savvy.
Oh, and if you have bananas sitting on your counter attracting fruit flies, mash them up (the bananas, not the fruit flies) and make this cake. It takes one bowl and about 5 minutes to mix up.
It is divine.


Banana Chocolate Chip Layer Cake 
A Bountiful Kitchen
print recipe

1 1/2 cups granulated sugar
3-4 medium bananas (equaling about 1 1/2 cups mashed bananas)
1/2 cup butter, room temperature
1/2 cup vegetable or canola oil
3/4 cup buttermilk
3 large eggs
1 teaspoon baking powder
1 teaspoon baking soda
1 teaspoon salt
2 1/3 cups flour
1 cup semi sweet chocolate chips

Chocolate Buttercream Frosting
3 cups powdered sugar
1/2 cup unsweetened cocoa powder
1/2 cup butter, room temperature
1 teaspoon vanilla
2 tablespoons milk, half and half or cream

Pre heat oven to 350 degrees. Grease and line (with parchment paper) two-9 inch round cake pans.
Place sugar, bananas, soft butter, oil, buttermilk and eggs in large bowl or stand mixer. Mix for about 2 minutes, until all ingredients are mixed well. Add all of the dry ingredients, except the chocolate chips and mix for an additional one to two minutes on high speed. Fold in chocolate chips. Spread the batter evenly into the two prepared pans.
Bake on middle rack of oven for about 40 minutes, or toothpick inserted in center comes out with a few moist crumbs attached.
Let cake cool, then frost with buttercream frosting.

Frosting:
Cream butter with all dry ingredients. Add vanilla, and milk a little at a time until desired consistency.
Place one of the cakes on platter, frost with 1/3 of frosting. Place second layer on top, frost top and sides of cake with remaining frosting. Top with chopped nuts, if desired.

Tips:
-This cake can also be baked in a 9x13 pan. Bake for additional 5-10 minutes, to insure middle of cake is cooked completely.

8/2/13

It's that time of year...Chocolate Zucchini Cake


On Tuesday, my friend Wendy gave me a couple of zucchini from her garden. I promised to make something yummy with the gift and post it.
The plan: to make something semi-healthy.
What got in the way of the plan: while out for my morning walk the next day, Melinda told me she made some of Laurie's Chocolate Zucchini Cake. So much for the plan.
Here it is. New and improved. Originally posted here (Aug 2010).
With frosting, this time around, for good measure.


Chocolate Zucchini Cake
Adapted a bit from Laurie Cutler by ABK
print recipe

½ cup butter
½ cup vegetable oil
1 ¾ cup sugar
2 eggs
1 teaspoon vanilla
2 ½ cups flour
6 tablespoons unsweetened cocoa
½ teaspoon cloves
½ teaspoon cinnamon
1 teaspoon soda
½ teaspoon salt
2 cups zucchini, grated*
½ cup buttermilk
1 cup chocolate chips
Whipping cream, or frosting (recipe below)

Cream together butter, oil and sugar. Add eggs and vanilla, beat. Add flour, cocoa, cloves, cinnamon, soda and salt and beat for additional 2 minutes. Add grated or blended zucchini and buttermilk. Blend well. Fold in chocolate chips.
Pour into a greased 9 x 13 pan and bake at 325 for 45 minutes (check with a toothpick).
Best when served slightly warm with fresh whipped cream or top with frosting (below).

Frosting:
1/4 cup butter, softened
2 cups powdered sugar
1/4 cup unsweetened cocoa
1 teaspoon vanilla
dash salt
milk or cream to thin, about 2-3 tablespoons
Beat all ingredients with mixer in bowl until smooth. Frost cake when cooled.

Tips:
-You may also bake in two-9 or 10 inch pie plates.
*This recipe has been altered a bit from the original. The original recipe calls for peeling and seeding the zucchini, I leave the peel on and don't seed. And I usually pulverize the zucchini in a blender with about 1/4 cup of water. The total amount used in the recipe is 2 cups, meaning I place the zucchini in a blender with about 1/4 cup of water and pulverize the zucchini until it looks like baby food. Then I measure out 2 cups. If it turns out to be a little less than 2 cups, no big deal. 1 3/4 is fine! Also, I've increased the cocoa in the cake from 3 tablespoon (original recipe) to 6 tablespoons.

7/6/13

Kash's Black Cherry Chocolate Dutch Oven Cobbler


We purchased our Dutch ovens about twenty years ago, with the thought in mind we would use the Dutch ovens for cooking in the wilderness.
Grant is a big time: camper/hiker/backpacker/bowhunter/all around guy's guy. Whatever that means. He loves anything that has to do with the out-of-doors. Me, on the other hand...
Well.
Let's just say a couple of days at our cabin fills my quota for getting in touch with nature. That said, once every three or four years, I dust off the Dutch ovens and channel my inner pioneer.

While I was at Stake Girl's Camp last week, my new friend Kash (who I was privileged to work with in the kitchen) provided this recipe and all of the ingredients (right down to the briquettes) for all the Young Women and their leaders at camp. Yikes. That was a lot of work. Thanks Kash.
The recipe was a winner! Everyone loved the gooey, rich, chocolaty-cherry dessert. It takes about two minutes to throw in the Dutch oven and cooks in about 30-40 mins. We made this at our cabin for the Fourth, and everyone loved it. I also made Kash's Red Raspberry Dutch Oven Cobbler, which I'll post next.
Get on your pioneer. You'll love this dessert.


Kash's Black Cherry Chocolate Dutch Oven Cobbler
Kash Castleberry
print recipe

one 12-14 inch dutch oven
2 cans cherry pie filling
1 box Devils Food Cake
1-12 oz can Black Cherry Soda ( I used Shasta)
1-12 oz bag chocolate chips, semi sweet or milk
heavy duty foil (optional)

About 1/2 hour before cooking:
Heat briquettes in chimney for 15-30 minutes until briquettes turn white. Directions here.
Line the dutch oven with heavy duty foil*. Spray foil lightly with cooking spray.
Spoon cherry pie filling into foil lined pan. Sprinkle dry cake mix evenly on top of fruit.
Pour Black Cherry Soda over dry cake mix. Mix gently with fork so the soda doesn't mix too deep into the cherry layer. Don't worry about mixing too much, the moisture will even out during baking.
Place the dutch oven lid on.
Place 7-10 coals below the oven, and 16 coals on top of the oven in a circular fashion.
Bake 25-35 minutes for a 14 inch oven and 30-40 for a 12 inch oven.
Check after about 15 minutes. When cake is done, remove from heat and sprinkle with chocolate chips. Place lid back on and allow chocolate to melt.  Serve warm with cream or ice cream.
Serves 15-18.

Tips:
-Dutch Oven purists will probably frown upon the use of foil to line the pan. I say easier is better while camping. You may make this dessert without lining the pan, but be prepared to clean up a sticky mess off the bottom of the pan :)
-I suggest preparing this dish before dinner. After the cobbler is done cooking, remove from heat.  It will keep warm for at least a couple of hours with the lid on.
-When we first started Dutch oven cooking, we (I use the term "we" loosely) thought if 10 coals on the bottom were good, 20 were better. Not so. If the recipe calls for 10 on the bottom and 16 on the top, follow the recipe suggestion. Or you'll have blackened cobbler.
-When baking in a Dutch oven, more of the coals should be on top (or on the lid) of the oven to prevent burning the bottom of the dish.
-Briquettes vs other brands-  Kash only likes to use Kingsford. I agree. We have experimented with other brands, Kingsford is best.

5/14/13

Award Winning Chocolate Chip Walnut Brownies


This recipe comes from Amy's Bread in NYC. They started making brownies in the early days of the bakery opening, and were given the "Best Brownie" award in NYC. Really, THE best brownie? I've been to New York, and can testify that there are bakeries (lots of them great bakeries) on almost every block. Reading about this "award winning" brownie caught my attention. The method of melting half of the choc chips into the batter intrigued me. Reminded me of  my fave chocolate cake recipe
Oh my. These are killer brownies. At $3.50 a brownie (at Amy's), they'll leave a small dent in your wallet if you are buying for a crowd, but you can bake them up at home for a lot less, in not too much time.
The recipe is easily adapted to a no-nut version, if you aren't partial to nuts. I made them both ways and can testify both are amazing. My favorite was the original walnut-packed bit of brownie heaven. Last word on this brownie:  If you don't want to make these at home, you have to make a trip to NYC to buy one. 
You choose, a trip or bake. 


Award Winning Chocolate Chip Walnut Brownies
Adapted from Amy's Bread, NYC
print recipe

3 1/3 cups (20 ounces) semisweet chocolate chips
1 cup unsalted butter
3 ounces unsweetened chocolate, chopped
1 cup granulated sugar
3 large eggs
1 tablespoon vanilla extract
3/4 cup  all-purpose flour
1 1/2 teaspoons baking powder
1/2 teaspoon baking soda
1/2 teaspoon kosher salt
11/2 cup chopped nuts, toasted (optional)* recipe without nuts- see tips below

Preheat oven to 350°. Place rack in bottom third of oven. Line a  9″x 13″ baking pan with foil* or parchment paper. Grease lightly.
Melt butter, half of the chocolate chips, and unsweetened chocolate in a double boiler (or microwave). Let mixture cool to warm.
Whisk sugar, eggs, and vanilla just until mixed. Over-mixing will cause crumbly brownies. Fold in warm chocolate mixture.
Place flour, baking powder, baking soda, salt and remaining chocolate chips into chocolate mixture all at once. Fold dry ingredients into chocolate mixture, then fold in chopped nuts just until combined.
Pour batter into prepared pan. Spread to an even thickness.  Place the pan into the oven. 
Bake for 10 minutes at 350, then lower the oven temperature to 325 (do not open oven). Bake an additional 15-20 minutes. The edges will be slightly firm and the center will be soft when they are fully baked. A toothpick inserted will come out with a few moist crumbs attached. Do not over bake. Cool completely in pan.
Brownies are easiest to cut after refrigerated. These will keep well in refrigerator for about a week, covered tightly. 
Yield 24 small or 12 large brownies. 

Tips:
-To toast nuts, place on baking sheet in 325 degree oven for about 7-10 minutes, or until fragrant. 
-I like to line the inside of the pan with foil for simple removal from the baking pan. It also makes cutting the brownies much easier. 
-This recipe is easily adapted to omit the nuts. If you are leaving out the nuts, use 1 cup flour instead of 3/4 cups flour as stated in the recipe. If you do not increase the amount of flour used, the brownies will take a long time to set up and be very wet in the middle and overcooked along the edges. I always compensate if I omit nuts in a recipe such as this one, which calls for a large amount of nuts, by increasing the flour just a bit. 
-Melting the butter and chocolate. I always do this on my gas stove.  If you have a stove that you are able to turn down to a very low temperature, you will not need a double boiler. Simply put the pan on the stove and turn to low. 
-Whenever I mix chocolate chips into a recipe, I throw the flour and other dry ingredients in at one time along with the chocolate chips to coat the chips with a bit of flour, this prevents the chocolate chips from sinking to the bottom of the brownie. 
-If you want a tender brownie, without having it fall apart, the key is to not over mix. This includes the beating of eggs and sugar together. Mix just until incorporated. 
-I love this cookbook from Amy's Bread, it is a collection of the sweet items they sell in the Bakery, along with fun stories about their customers, the history of how they came to sell certain items through trial and error, etc. Everything I've made out of this book I has been a ten on the yum scale.


4/11/13

Billion Dollar Bars aka Homemade Candy Bars


Do you Pinterest?
Apparently everyone is Pinning these days.
Last week, Bonnie Oscarson was named the new General Young Women President of the LDS (Mormon) church. The lead line of a news story I read about Sister Oscarson stated that she is on Pinterest. Of course,  people weighed in on her activity online. Some of the comments stated were negative. Others positive. My thought?
Wow, she's one of us :)
Here's a recipe I found recently and Pinned. If you are a peanutbutterandchocolate kind of gal, you have to make this.
R I G H T  N O W .


Billion Dollar Bars

Bottom Chocolate Layer:
1 cup milk chocolate chips (or half semi-sweet)
1/3 cup butterscotch chips
1/3 cup peanut butter
Melt milk chocolate chips, butterscotch chips and peanut butter in a pan over low heat; stirring constantly. Pour mixture into a 9 x 13″ baking pan lightly coated with nonstick spray or lined with plastic wrap which is long enough to drape over sides of the pan. Spread mixture and place in the refrigerator for 30 minutes.

Nougat Layer
4 tablespoons butter
3/4 cup sugar
1/4 cup light brown sugar
1/4 cup evaporated milk
1-1/2 cups marshmallow creme
1/3 cup peanut butter
1-1/2 cups chopped salted peanuts (optional)
Melt butter over medium heat in pan; add sugars and evaporated milk; bring to a boil, and cook additional 5 minutes while stirring. Remove from the heat and add marshmallow creme and peanut butter. Pour over the bottom layer and gently spread mixture. If you use peanuts, scatter across the top. Place in the refrigerator for 15 - 30 minutes.

Caramel Layer
1 (14-ounce package) caramel candy
1/4 cup cream
1 tablespoon butter
Place the unwrapped caramel candy, butter, and cream in a medium saucepan. Place over low heat and stir until the mixture has completely melted and is smooth. Pour in the pan and quickly spread over nougat layer. Place in the refrigerator for 15 - 30 minutes.

Top Chocolate Layer
1 cup milk chocolate chips (or half semi-sweet)
1/3 cup butterscotch chips
1/3 cup creamy peanut butter
chopped almonds
Melt milk chocolate chips, butterscotch chips, and peanut butter in a pan over low heat, stirring consistently. Pour over the caramel layer and spread. 
Sprinkle chopped nuts over top of chocolate while still soft. 
Place in the refrigerator for at least 1 hour before cutting into squares. These are very rich, cut into small squares. If eating right away, place on platter and serve. If the bars start to get too soft, place in refrigerator to firm up a bit. 
Store in an air-tight container in refrigerator.


2/13/13

Chocolate Raspberry Tarts


Looking for a decadent treat for your Valentine? Nothing says "I love you"  like a home made chocolate dessert.
Well, maybe diamonds.
Yeah, diamonds or chocolate.
In that order.
Love you.


Step by step instructions. Just for you :)


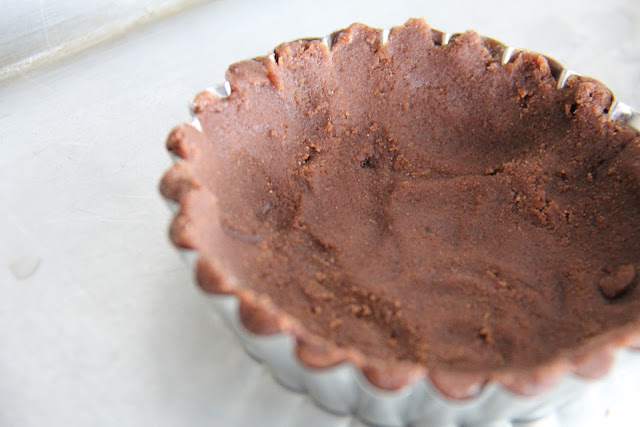
Make the crust, press into individual tart pans. Got mine at HomeGoods 6 for $4.99 .


Bake and remove from oven to cool completely.


After crust is cooled, spread with about a tablespoon of raspberry or strawberry jam.


Break up the chocolate...


Heat up heavy cream just until barely boiling, reduce heat and add chocolate.


Turn off heat and whisk until thick and creamy. 
Try not to eat all of the chocolate while testing. 


Spoon thickened chocolate mixture into the prepared crusts. Almost done.


Wash the fresh raspberries, drain on paper towels. 


Arrange raspberries on top of the filling, dust with a little powdered sugar just before serving. 


Chocolate Raspberry Tarts
adapted from David Lebovitz
1 stick (4 oz) butter, room temperature
1/2 cup sugar
1 egg yolk
1 cup all purpose flour
2 1/2 tablespoons unsweetened cocoa powder
about 3/4 cup seedless raspberry or strawberry jam
8 oz semisweet or bittersweet chocolate, chopped
1 cup heavy whipping cream
6 ounces fresh raspberries
1/2 tsp water
powdered sugar for dusting

Beat butter and sugar on medium speed until smooth and creamy. Add the egg yolk, beat well, and scrape down sides of bowl.
Add the flour and cocoa powder, beat on the lowest speed until dough has just come together (but still has small to medium clumps) and looks moist with a dark uniform color. Scrape down the bowl and use the spatula to incorporate anything that isn’t mixed in.
Lightly grease the pans, then wipe out the excess grease. Divide dough and place into 6- 4 inch tart pans. Use your fingers to evenly press dough and spread along bottom of the pans and up the sides.  ( if the dough is too soft, refrigerate the dough 15 minutes before pressing). This dough may be made in advance*see tips below.
Preheat the oven to 350 degrees with  rack in the lower third of oven. Place dough filled pans on a cookie sheet and bake in lower third for 15 minutes. Remove and change to middle rack for 8 more minutes, for a total of 20-23 minutes baking time.
Remove tart pans to a cooling rack and use the rounded side of a spoon to press the center down and make more room for filling. Let cool completely (you can do this in refrigerator for faster results).
Set a tablespoon of the jam aside in a small bowl or glass. Spoon about 1 tablespoon of jam into each tart crust and spread to cover the bottom.
Heat the heavy cream over medium heat in a saucepan, taking care to not scorch. Put chopped chocolate in with the heavy cream in the saucepan. Remove from heat. Begin whisking gently to blend completely and melt all the chocolate.  Chocolate will blend into the cream and form a smooth, thick filling. Spoon ganache evenly into each crust.
Refrigerate the tarts for at least 1 hour, until the filling is firm. Remove from fridge and arrange raspberries on top of each tart.
Mix reserved tablespoon of jam with the 1/2 teaspoon of water and heat in microwave for about 15 seconds. Brush the jam mixture onto the tops of the arranged raspberries if desired**. Serve immediately or refrigerate until serving. Use a mesh strainer to sift a dusting of sugar onto the tarts just before serving.

Tips:
-* The dough keeps 3 days in refrigerator and 6 weeks in freezer.
-**I did not take the time to glaze the berries after placing on the tarts. This step is important if you are keeping the tarts for more than a day, it will help the berries to stay looking fresh. Also, it gives the berries a nice shiny glazed look.