Showing posts with label main dish. Show all posts

7/8/10

Alton Brown's Baked Mac and Cheese


Alton Brown. Like most FN stars, you either love or hate him. I love his quirky show. He is kind of the Cooks Illustrated aka Test Kitchen of the FN. Does it bug you that I like to abbreviate? My friend KD likes it, I like it, it saves time, and causes you to think- "Why does she do this?" Or "What does FN stand for?"
So I'm going to keep doing it.
Anyway. I usually make the Foster Family version of Mac and cheese, but thought the panko topping on this recipe looked yummy, and gave it a try. I learned something while reading the notes on this recipe. Have we talked about this before? Warning! Long ramble on comments: When you get a recipe off of the WWW, always look to see if there are any comments from cooks who have tried the recipe. Some of the comments need to be taken with a grain of salt (haha just realized this is a pun on the following ramble) - you know, kind of like when you read reviews on Trip Advisor (love that site). Some comments are really helpful. If I read a recipe with multiple negative reviews, I steer clear. If you read over and over that a cube of butter can be left out with great results, prob true. So when I read a few pages of reviews on this recipe (there were over 1200), some readers stated the recipe was bland. Then I read a comment about salt in the water. This cook suggested that salting the water meant salting it to the point where it was like SEA water. Ok, well, I spent some time at the ocean recently, and got a little of that in my mouth. I can tell you this. I never salt my pasta water that much. So this time, I did. And it made a difference. Thanks commenter lady. You helped me become a better cook today.
Oh btw - you are going to love this dish. Creamy, cheesy (but not in a sick, processed cheese kind of way) and a little crunchy with the Panko topping.


Alton Brown's Baked Macaroni and Cheese
Food Network
print recipe

1/2 pound elbow macaroni (about 2 cups)
3 tablespoons butter
3 tablespoons flour
1 tablespoon powdered mustard
3 cups milk
1/2 cup yellow onion, finely diced*
1 bay leaf
1/2 teaspoon paprika
1 large egg
12 ounces sharp cheddar, shredded
1 teaspoon kosher salt
Fresh black pepper

Topping:
2 tablespoons butter
1 cup panko bread crumbs

Preheat oven to 350 degrees F.

In a large pot of boiling, salted water cook the pasta to al dente.

While the pasta is cooking, in a separate pot, melt the butter. Whisk in the flour and mustard and keep it moving for about five minutes. Make sure it's free of lumps. Stir in the milk, onion, bay leaf, and paprika. Simmer for ten minutes and remove the bay leaf.

Temper in the egg. Stir in 3/4 of the cheese. Season with salt and pepper. Fold the macaroni into the mix and pour into a 2-quart casserole dish. Top with remaining cheese.

For Topping:
Melt the butter in a saute pan and toss the bread crumbs to coat. Top the macaroni with the bread crumbs. Bake for 30 minutes. Remove from oven and rest for five minutes before serving.

Tips:

- *I minced the onion, bc I was making it for a family with younger kids, who I thought might not like onions, I could not detect the onions in the dish after baking.
-To learn how to temper an egg into hot liquid, click on this link for a nifty video tutorial.
or read this: When egg yolks are added into a hot mixture, to help ensure that they do not suddenly cook or scramble, a technique called tampering is used. With a ladle, gradually add about 1 cup of the hot mixture into egg yolks, mixture constantly. Then, add egg yolk mixture to mixture in pan and continue cooking according to the recipe.

5/22/10

Mexican Pulled Pork Carnitas


I wanted to have a little Cinco De Mayo celebration earlier this month. Between baseball rain outs and reschedules, end of school year craziness, and lifeingeneral, our celebration was reduced to a throw together dinner. You know how my kids LOVE Boston Butt. I found a couple of recipes that looked easy and yummy-one was a Cooks Illustrated recipe and another claiming to be the "best pork carnitas, EVER."
So, I ran to Dick's Market, came home, turned on the oven, threw a butt roast in the oven for about 4 hours. Went back to micro managing my kids lives. At the 4 hour 15 min mark, dinner was ready. So- about 20 minutes total prep (working) time.
Other than Stephen picking off the radishes, it received rave reviews, which is no small victory. Trust me, this can be a tough crowd.


Mexican Pulled Pork Carnitas
adapted from Cooks Illustrated

Pork
1- 3 1/2 to 4 lb boneless pork butt (don't go smaller than 4)
2 tablespoons ground cumin
1 small onion, sliced
2 bay leaves, crushed
2 tablespoons dried oregano leaves
1 teaspoon salt
1/2 teaspoon pepper, ground
2 tablespoons lime juice (about 1 lime)
1/2 cup water
1 medium orange, halved

Tortillas and garnishes:
12-15 6 inch corn tortillas, (I like white corn)
lime wedges
minced onion, red, white or yellow
fresh cilantro leaves
thinly sliced radishes
avocado, chunked
sour cream

Preheat oven to 350 degrees.
Place roast in heavy oven proof pan. Squeeze lime and orange juice on top of roast. Rub pork with all dry ingredients. Pour water around sides of roast. Lay halves of lime and orange in pan with roast and water. Lay onion slices on top of roast. Cover pan with tight fitting lid.
Place roast in oven. Set timer for 2 hours. After 2 hours, turn oven to 225 degrees, or off completely. Do not open oven. Leave roast in oven for an additional hour, or two. Remove and let cool for a few minutes. Pull all remaining fat off of meat and discard. Chop pork and set aside.
About 15-20 minutes before you want to eat, chop garnishes and set aside. Turn on griddle to about 300 degrees, or if using a pan on stove, medium high heat. Spray surface with Pam or rub with vegetable oil. Quickly grill tortillas in hot pan until each side is puffed, about 10-15 seconds each side. You may grill the tortillas ahead of time and wrap in paper towel and foil to keep warm. Top each tortilla with a bit of meat and other garnishes.
Serves 4.

Tips, confessions:
-I actually forgot to add the orange juice, it was still wonderful.
-I grill the tortillas as we eat.
-Often people ask me if it's ok to substitute Pork Loin Roast for Boston Butt. Boston Butt is a roast that has a high fat content. If you use another type of roast in this type of recipe, it will not be as flavorful. If you trim the fat off of the Boston Butt, it will not be as flavorful. The fat is what keeps the meat moist, and gives it a hard to duplicate flavor.
-When I cook Boston Butt's I vary the amount of cooking time. It's a perfect Sunday or busy day type of roast. Set the timer to cook the meat for about 2 hours, then either reduce the heat to about 225-250 or simply turn the oven off for up to 3 hours. If the oven door is not opened, it will stay warm for several hours and continue to cook the roast at a low temperature.

5/7/10

Mother's Day Menu 2010 -Part 5- Sweet and Sticky Grilled Chicken


Mom,

Thanks for:
Hot breakfast every morning. I begged for cold cereal, but you would only let us have it two mornings a week. Because you thought eggs, ham, potatoes and toast were healthier :) Remember the phase I went through in jr high when I wanted soup & sandwich for breakfast? Of course, you accommodated me. Weird kid.
All of those home made lunches, because I wouldn't eat school lunch.
All of the drill and cheer costumes/uniforms and all of the school clothes you hand made for me. The sequined hat you made when I was in baton with matching wrist cuffs (red white and blue, of course). The mint green and white striped poncho you crochet in the 4th grade ( still have it), with pom poms, and fringe on the ends that Dad helped cut, while I waited for the school bus. All of the Mother -daughter matching dresses. How did I miss out on the sewing gene?

Always welcoming my friends into our home.
An endless supply of brownies, cookies and your favorite, Hawaiian Punch for fam and friends.
You taught me about love for family. Family was always first for you and Dad. I look back on my childhood with fond memories. Now that my third child is about to graduate from high school, I'm starting to really understand how wonderful you were/are. I'm just beginning to "get" what you gave up for me. You moved thousands of miles away from your mom. You left all of your friends and family in Japan to be with your husband, and raise your kids in a country where you struggled to learn the language. You had to learn how to drive a car at 30. How to write checks, keep a house, take care of us, all without the support of your family. Sometimes, Dad was on a ship for months at a time. The pay of a Navy Chief was small, and somehow, you seemed to make it all work-without credit cards! About once a year you could call home and talk to your family. I remember those calls- lots of laughing and loud talking in Japanese; the call always ended with a few tears.


You never had anything negative to say, about friends, neighbors, Dad or your kids. You just loved us. All of us. My lasting memory of our days on Country Lane will be you- leaning out of the side door in your house coat saying "Play nice". That's been your life motto. Play nice. Treat others with love and kindness. I'm still learning. When I grow up - all the way, I hope to be like you.
Love you Mom.

If you are lucky enough to be with your mom this Mother's Day, treat her to this yummy and simple Sweet and Sticky chicken. She'll absolutely LOVE the ginger pomegranate sauce!


Sweet and Sticky Grilled Chicken

1 1/2 cups Pomegranate juice
1 cup plus 2 tablespoons packed dark-brown sugar
1/2 cup soy sauce
2 tablespoons finely grated fresh ginger
1 garlic clove, minced
8 chicken breast halves, or equivalent amount of assorted chicken pieces
Coarse salt,pepper
olive oil to prevent sticking to grill


Bring juice, sugar, soy sauce, ginger, and garlic to a boil in a saucepan. Reduce heat, and simmer until mixture has thickened to the consistency of honey, 35 to 40 minutes. Let cool.
Using a sharp knife, make three diagonal slashes through the skin and flesh on both sides of each piece of chicken (this will help the flavors permeate the meat). You may also use skinless chicken.
Preheat grill to medium-low. (If you are using a charcoal grill, coals are ready when you can hold your hand 5 inches above grill for just 7 seconds.) Generously salt and pepper chicken and brush with olive oil. Place chicken on grill, cook for about 5 minutes. Turn chicken and begin basting side that was just grilled. Close cover, and grill 4 minutes. Flip chicken, and brush with additional sauce. Continue to cook, flipping and brushing with sauce every 4 to 5 minutes, until cooked through, about 20 minutes total.

4/1/10

Fried Squirrel


With Easter only 4 days away, I'm thinking about our family Easter dinner. Ham- a slam dunk. From there - the possibilities are endless. Lamb? Pork? Chicken Crepes? Rabbit? Probably not the best time of year to cook a rabbit, being Easter and all.
Maybe we'll have Squirrel. I'm not quite sure how many squirrel I will need for 20 people? This recipe is from White Trash Cooking, one of my fave cookbooks. Remember last year when I posted Dana Pullen's Chicken Feet and Rice? Another absolutely delish dish.
Bon Appetite!


Hopefully, you won't encounter this guy while you are out hunting...


Fried Squirrel
adapted from "White Trash Cooking" by Ernst Matthew Mickler

Make sure all the hair is cleaned off the squirrel. Cut it up. If it's old and tough, put it in the pressure cooker for about 15-20 minutes.
Salt and pepper it generously. Cover with flour and fry in a cast iron skillet on medium fire until brown and tender. This is a real sweet meat.
You can smother a squirrel (with gravy) just like a chicken.


Tips:
-Squirrel is one of the finest and tenderest of all wild meats. Its flavor is mild, rarely gamey. There is no need for soaking, and seldom any need for parboiling.
-Hunting squirrels is not legal in all states. Check your local laws before harvesting (hunter talk) a squirrel. Also confirm with local authorities- if a squirrel dies of old age, or is roadkill, is it legal to use as an ingredient for dinner?

Happy April 1st.


2/17/10

Sloppy Joes with Homemade Hamburger Buns


Sloppy Joes. So simple. I'm not talking about opening a can of Manwich, or using a package of Schilling. Making your own. Homemade! For years, I resorted to the can or package. Every time I made them, I thought, this is okay, but it would be so much better homemade. I mean, how difficult could it be to make a good Sloppy Joe concoction of my own? I pulled up a few recipes, messed a round a little, and came up with the attached. They were yummy, and served on a fresh bakery roll, even better. Then I came across this recipe for Homemade Hamburger Buns. It was meant to be.
Buns. Funny word. Favorite bun expressions from Grant: "Home of the big bun"  said whenever I say the word "bun" or whenever we buy a burger or sandwich with a big bun; "Nice buns" "Wonder buns" and "Get your buns over here". "Nice buns" referring jokingly to my buns, bc they are, FLAT. Is this too much information?


You'll love these buns. And the Sloppy Joes too.


Sloppy Joes

1 1/2 lb extra lean ground beef
1 onion, chopped
1 red pepper, chopped (optional)
1 clove garlic, minced or 1/4 teaspoon garlic powder (optional)
1 6 oz can tomato paste
1 15 oz can tomato sauce
3 tablespoons Worcestershire
1/4 cup brown sugar
1 teaspoon salt
1/2 teaspoon ground pepper
water 1/4 to 1/2 cup to thin sauce, if needed

Brown ground beef in skillet. Drain off any grease. Add chopped onion, red pepper and garlic. Season with salt and pepper. Saute until onion is softened. Add tomato paste, sauce, Worcestershire and brown sugar. Cook over medium heat. If mixture is too thick, thin with 1/4 to 1/2 cup of water. Serve with hamburger buns, top with cheese, if desired.


Homemade Hamburger Buns

1 cup lukewarm water
1 tablespoon instant yeast
2 tablespoons sugar
2 tablespoons butter, melted
1 egg
3 1/4 cup all-purpose flour
1 teaspoon salt


For glazing buns:
1 egg yolk plus 1 tablespoon cold water
sesame seeds (optional)


Using a large bowl, sprinkle the yeast and sugar into the water and leave for 5-10 minutes, until bubbly.
Add remaining ingredients. Mix well, knead until smooth. If using food processor, use dough hook, mix until dough is soft and smooth, about 5 minutes. Add a little flour if dough is sticky. Let dough sit in bowl, covered until doubled in size, about 1- 1 1/2 hour. Divide dough in half, then divide each half into 5 pieces and shape into a ball. Flatten each dough ball to about a 1 1/2 inch thickness. Place the buns on a greased baking sheet, let rise again for 30 minutes until puffy. Preheat oven to 375 degrees. Glaze the buns with egg yolk and water mixture (if desired), then sprinkle with sesame seeds. Bake the buns in lower half of oven for 12 - 15 minutes, until golden brown. Remove from oven and cool. Slice buns when cooled, serve with hamburgers or sloppy joe mixture.

Tips:
-I wasn't crazy about the look of the glaze. I prefer a floured matte finish to the top of my buns. Uh, my hamburger buns.
-In the future,if I wanted a shiny bun, I would use a whole egg, or maybe just an egg white to glaze the top of the buns, and forget about the yolk/water mixture.

2/4/10

Cook's Illustrated Baked Ziti


I've tried several recipes similar to this, and I believe the Cook's people got it right, again. Perfect Baked Ziti. If you haven't read the article, here it is.


"...Most versions seem like they went directly from the pantry into the oven, calling for little more than cooked pasta, jarred tomato sauce, a container of ricotta, and some preshredded cheese. The results—overcooked ziti in a dull, grainy sauce topped with a rubbery mass of mozzarella—more than earn the dish its reputation as mediocre church-supper fare."

YIKES. (My commentary)

The Goal
To make this dish the way it’s meant to be—with perfectly al dente pasta, a rich and flavorful sauce, and melted cheese in every bite.

The Solution
We didn’t want to spend all day hovering over a pot of stewing tomatoes, so we needed a sauce that was big on flavor and light on prep. Most “quick” tomato sauces call for sweating garlic in olive oil before adding some type of tomato product. Whole canned tomatoes and crushed tomatoes both had good flavor but took time to cook down. To speed things up, we added a can of diced tomatoes. Next, fresh basil added rich, aromatic savor, but more herbs were essential. In the test kitchen, we usually opt for fresh herbs, but for convenience and without sacrificing flavor, we chose dried oregano. Just when the tomato sauce seemed perfect, we added ricotta, and a familiar problem reared its head: Rather than baking up creamy and rich, the ricotta was grainy and dulled the sauce. A different dairy product was clearly in order.

First we tried cottage cheese, and, to our surprise, it was a success. Its pillowy curds have a texture similar to ricotta, but creamier and tangier. And since cottage cheese curds are bigger, they bake up with none of ricotta’s graininess. For our next batch, we boosted the flavor by combining the cottage cheese with eggs, Parmesan, and heavy cream thickened with a bit of cornstarch. Adding this milky, tangy mixture to the tomato sauce produced a sauce that was bright, rich, and creamy—all at the same time.

As for the pasta, most recipes cook the ziti in boiling water until al dente before tossing it with the sauce and baking. But pasta continues to absorb sauce as it bakes, with two drawbacks: overcooked pasta and sauce that has been robbed of moisture. We found that cooking the pasta for about half the cooking time that most recipes call for and with nearly twice the amount of sauce yielded perfectly al dente pasta in the baked dish with plenty of sauce left to keep the whole thing moist.

The remaining question was how to deal with the cheese. Grated cheese congeals into a mass that makes the dish unappetizing and difficult to portion. Instead of shredding the mozzarella, we cut it into small cubes—reasoning that they would melt into distinct but delectable little pockets of cheese—and mixed half of the cheese with the sauce just before adding it to the pasta, then sprinkled the rest over the top. This strategy yielded a hot, bubbly success. The cubes on top remained perfectly distributed, and the casserole below was dotted with gooey bits of cheese."


Me again. Absolutely delish. I loved it. Grant loved it. The boys loved it. Hardly any leftovers. That pretty much says it all.


Cook's Illustrated Baked Ziti

Note: The test kitchen prefers baked ziti made with heavy cream, but whole milk can be substituted by increasing the amount of cornstarch to 2 teaspoons and increasing the cooking time in step 3 by 1 to 2 minutes. Our preferred brand of mozzarella is Dragone Whole Milk Mozzarella. Part-skim mozzarella can also be used, but avoid preshredded cheese, as it does not melt well.

1 pound whole milk cottage cheese or 1 percent cottage cheese
2 large eggs , lightly beaten
3 ounces grated Parmesan cheese (about 1 1/2 cups)
Table salt
1 pound ziti or other short, tubular pasta
2 tablespoons extra virgin olive oil
5 medium garlic cloves , minced
1 (28-ounce) can tomato sauce
1 (14.5-ounce) can diced tomatoes
1 teaspoon dried oregano
1/2 cup plus 2 tablespoons chopped fresh basil leaves
1 teaspoon sugar
Ground black pepper
3/4 teaspoon cornstarch
1 cup heavy cream
8 ounces low-moisture whole-milk mozzarella cheese , cut into 1/4-inch pieces (about 1 1/2 cups)

INSTRUCTIONS
1. Adjust oven rack to middle position and heat oven to 350 degrees. Whisk cottage cheese, eggs, and 1 cup Parmesan together in medium bowl; set aside. Bring 4 quarts of water to boil in large Dutch oven over high heat. Stir in 1 tablespoon salt and pasta; cook, stirring occasionally, until pasta begins to soften but is not yet cooked through, 5 to 7 minutes. Drain pasta and leave in colander (do not wash Dutch oven).

2. Meanwhile, heat oil and garlic in 12-inch skillet over medium heat until garlic is fragrant but not brown, about 2 minutes. Stir in tomato sauce, diced tomatoes, and oregano; simmer until thickened, about 10 minutes. Off heat, stir in ½ cup basil and sugar, then season with salt and pepper.

3. Stir cornstarch into heavy cream in small bowl; transfer mixture to now-empty Dutch oven set over medium heat. Bring to simmer and cook until thickened, 3 to 4 minutes. Remove pot from heat and add cottage cheese mixture, 1 cup tomato sauce, and ¾ cup mozzarella, then stir to combine. Add pasta and stir to coat thoroughly with sauce.

4. Transfer pasta mixture to 13- by 9-inch baking dish and spread remaining tomato sauce evenly over pasta. Sprinkle remaining ¾ cup mozzarella and remaining 1/2 cup Parmesan over top. Cover baking dish tightly with foil and bake for 30 minutes.

5. Remove foil and continue to cook until cheese is bubbling and beginning to brown, about 30 minutes longer. Cool for 20 minutes. Sprinkle with remaining 2 tablespoons basil and serve.

Tips:
- Use fresh grated Parmesan.
-I used regular, not heavy cream.
-Not a huge garlic fan, so I only used about 1 clove.


1/22/10

Sweet and Sour Meatballs


It's that time again. The Superbowl is just around the corner. Superbowl= supersnacks. Unfortunately, Grant's all time favorite pro football team, the Vikings, lost last night in overtime to the Saints. Looking back, Grant has come a loooong way since we were first married. This is the team he latched onto as a 10 year old. A kid from SLC, UT, loving the Minnesota Vikings? Makes no sense to me. He's stuck with them through good (few and far between), and years and years and years of bad. For years I tried to persuade him to switch teams. Maybe pick a team with a better winning average? Last night he, along with the entire state of Minnesota were let down, again. Oh well. The good news? He is maturing, a bit. In fact he left at halftime with the score tied, to attend a church meeting. He told our boys- "there are more important things in life than football".
Wow. Revelation.
Now, if I could get him to grow out of the bow hunting phase that has lasted 25, umm actually 27 years...

So, the meatballs...This is a basic recipe I spiced up a bit. It's quick and easy and unbelievably better than store bought meatballs.
Oh, frozen meatballs- don't go there.
As my boys like to say - not good for your game.


SWEET & SOUR MEATBALLS
printable recipe

1 lb. lean ground beef
1/2 c. dry bread crumbs
1/4 c. milk
1/4 cup finely chopped onion
1 tsp. salt
1 teaspoon dry mustard
1 tsp. Worcestershire sauce
1 egg


SWEET & SOUR SAUCE:

1 c. packed brown sugar
3 tbsp. cornstarch
2 cans (13 1/4 oz.) pineapple chunks in juice
1 tablespoon fresh grated or minced ginger
1 teaspoon dry mustard
1 green pepper, large dice
1 red pepper, large dice

MEATBALLS:
Mix ingredients, shape into 20 (1 1/2 inch) balls. Cook in ungreased 9x13 pan in 400 degree oven until light brown, 20 to 25 minutes.

SWEET AND SOUR SAUCE:
Cook meatballs as directed above; remove from cookie sheet, set aside.
Mix brown sugar and cornstarch in saucepan. Stir in juice from pineapple, ginger and dry mustard. Heat to boiling, stirring constantly; reduce heat. Add meatballs and pineapple. Cover, simmer, stirring occasionally, 5-10 minutes. Stir in green and red pepper. Cover; simmer until crisp-tender, 5 minutes. Keep warm in chafing dish or crock-pot.
Make approximately 24-28 (about 1 1/2 ") size meatballs.

Tips:
-I wait to add the peppers until just before serving. It helps keep the veggie colors bright.
-These are great served over rice for dinner.

1/6/10

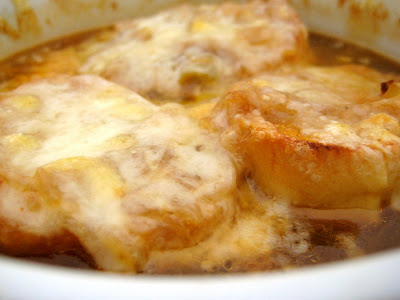
Classic French Onion Soup


French onion soup. How many people say it's their all time favorite soup? Creating an outstanding French onion soup experience (in my opinion) includes: home made broth; deep, dark caramelized yellow onions; good quality baguette (preferably stale); and the best Gruyere cheese you can buy.
Now, I know you are going to look at this recipe and say, Sheesh, have you ever heard of Campbell's ?? YES, my pantry is stocked with it. For the kids, or a quick lunch, it has it's place. Let's face it. Using canned soup won't produce the same rich flavor you'll get if you make the broth yourself. If you want to indulge yourself, or someone you love :) invest a little time and make this special soup. Nummy.


This recipe is adapted from Fine Cooking Magazine and Anne Willan, renown French chef, cookbook author and founder of La Varenne Cooking School.


Roasted Beef Broth

best if you make this the day (or two before serving)

5 lb. meaty beef or veal bones, such as shanks, knuckles, and ribs
2 medium carrots, cut into big chunks
2 medium yellow onions, quartered
1 bouquet garni (1 sprig fresh thyme, 1 bay leaf, and 4 parsley stems, tied with twine)
1 Tbs. black peppercorns
1 Tbs. tomato paste

Position a rack in the center of the oven and heat the oven to 450°F.

Put the bones, chopped carrot and onion on a large rimmed baking sheet and roast until brown, about 45 minutes to 1 hour.

With a slotted spoon or tongs, transfer the roasted bones and vegetables to a stockpot, leaving any rendered fat in the pan. Add the bouquet garni, peppercorns, tomato paste, and 5 to 7 quarts cold water (enough to cover the bones and vegetables by a couple of inches) to the pot. Bring to a boil slowly over medium heat, reduce the heat to medium low or low, and simmer, uncovered, skimming the surface occasionally with a slotted spoon until the broth is flavorful and reduced enough to just barely cover the bones and vegetables, 4 to 5 hours.
Strain the broth into a large bowl, cover, and chill. Skim off all fat before using.

make ahead tips:
The broth can be refrigerated for up to 3 days or frozen for up to 2 months.


French Onion Soup

2 oz. (1/4 cup) unsalted butter, more for the baking sheet
5-6 medium-large yellow onions (about 2 lb.), thinly sliced (8 cups)
Kosher salt and freshly ground black pepper
1 tsp. granulated sugar
1 small baguette (1/2 lb.), cut into 1/2-inch slices
2 quarts Roasted Beef Broth (recipe above) or canned beef broth :(
1 bay leaf
2-3 cups grated Gruyere

Melt the butter in a 4-quart pot over medium heat. Stir in the onions and season with 2 tsp. salt and about 1 teaspoon fresh ground pepper. Press a piece of foil onto the onions to cover them completely, cover the pot with a lid, and cook, stirring occasionally (you will have to lift the foil), until the onions are very soft but not falling apart, 40 to 50 minutes. Remove the lid and foil, raise the heat to medium high, and stir in the sugar. Cook, stirring often, until very deeply browned, another 10 to 15 minutes.

Meanwhile, to make the croûtes (baguette toasts), position a rack in the center of the oven and heat the oven to 375°F. Butter a rimmed baking sheet and arrange the baguette slices on the sheet in a single layer. Bake until the bread is crisp and lightly browned, turning once, 20 minutes total. Set aside.

Add the broth and bay leaf to the caramelized onions and bring the soup to a boil over medium-high heat. Reduce the heat to medium low and simmer for 10 minutes to blend the flavors. Discard the bay leaf and season to taste with salt and pepper. Keep broth hot.

To serve, position a rack 6 inches from the broiler and heat the broiler to high. Put 6 to 8 broiler proof soup bowls or crocks on a baking sheet. Put 2 or 3 croûtes in each bowl and ladle the hot soup on top. Sprinkle with the cheese and broil until the top is browned and bubbly, 2 to 5 minutes. Serve immediately.

Tips:

-I added about 3-4 teaspoons of salt, total.

-This is not a difficult recipe, just time consuming. If you break it into steps, it is simple:

1. Brown the bones and veggies.
2. Cook the broth.
3. Refrigerate the broth and skim the fat.
4. Caramelize the onions.
5. Make the croutes.
6. Put the soup together, broil and serve.

12/29/09

Short Ribs Provencale with Creme Fraiche Mashed Potatoes


Hope you all had a wonderful Christmas/Hanukah/holiday celebration!
Someone asked me the other day if I cook anything special for New Years Day. No, I don't. But if I did, it would probably be something really, really yummy, special, but a dish that doesn't require a lot of preparation. I love a lazy New Years Day. Love this recipe. It's absolutely delish. One of my all time favorites. Found it a few years back and have made it several times. One year I prepared it for my Recipe Club group. When I brought it to the table, they applauded! Wow. That was a first. You have to know this group of ladies. They LOVE food. And appreciate good food when they see/taste it. Which brings me to my next story.
People often comment about how lucky my family is, are, whatever. Ahem. Well. This story illustrates how you can't be a celeb in your own kitchen. The week after I made this dish for Recipe Club, I made it for my family. The dialogue went something like this:

Me: "What do you think??"
Family: "Tastes like roast beef and mashed potatoes."
Me: "THIS WAS THE BON APPETIT DISH OF THE YEAR."
Family: blank stare


Short Ribs Provencale with Creme Fraiche Mashed Potatoes

2 tablespoons (or more) olive oil
6 pounds meaty beef short ribs
1 large onion, finely chopped
1 medium carrots, finely chopped
1 celery stalk, finely chopped
3 whole garlic cloves, peeled
2 tablespoons all purpose flour
1 tablespoon dried herbes de Provence*
2 cups red Zinfandel ( I used red or burgundy cooking wine, sold in the grocery near the vinegars and reduced the amount to 1 1/2 cups)
2 1/2 cups canned beef broth
14 1/2-ounce can diced tomatoes in juice, or 2 cups fresh tomatoes with
about 3/4 cup water added
1 bay leaf
3/4 cup water
24 baby carrots, peeled
1/2 cup Niçois olives,** pitted, optional
3 tablespoons chopped fresh parsley

Preheat oven to 325°F.
Heat 2 tablespoons oil in heavy large ovenproof pot over medium-high heat. Sprinkle ribs with salt and pepper. Working in batches, add ribs to pot and brown well, turning often, about 8 minutes per batch. Using tongs, transfer ribs to large bowl.
Pour off all but 2 tablespoons drippings from pot or add oil as necessary to measure 2 tablespoons. Add onion, chopped carrot, and celery and cook over medium-low heat until vegetables are soft, stirring frequently, about 10 minutes. Add garlic, flour, and herbes de Provence; stir 1 minute. Add wine and 2 cups broth; bring to boil over high heat, scraping up browned bits. Add tomatoes with juices and bay leaf. Return ribs and any accumulated juices to pot. Add carrots. If necessary, add enough water to pot to barely cover ribs and vegetables. Bring to boil.
Cover pot tightly and transfer to oven. Bake until ribs are very tender, about 2 hours 15 minutes. (Can be made 1 day ahead. Cool slightly, then refrigerate uncovered until cold. Cover and keep refrigerated. Bring to simmer before continuing.)
Add remaining 1/2 cup broth, and Niçois olives (if using) to pot. Cover, return to oven and continue cooking at 350°F about 15 minutes. Discard bay leaf. Transfer short ribs and vegetables to platter. Tent with foil to keep warm. If necessary, boil sauce to thicken slightly. Season to taste with salt and pepper. Pour sauce over short ribs. Sprinkle with parsley.
* A dried herb mixture available at specialty foods stores and in the spice section of some markets. A mix of dried thyme, basil, savory, and fennel seeds can be substituted.
** Small brine-cured black olives; available at Italian markets, specialty foods stores, and some supermarkets.

CREME FRAICHE MASHED POTATOES
3 1/2 pounds russet potatoes, peeled, quartered
2/3 cup creme fraische or sour cream
1/4 cup (1/2 stick) unsalted butter

Cook potatoes in large pot of boiling salted water until just tender, about 25 minutes. Drain. Return potatoes to pot. Add crème fraîche and butter; mash until smooth. Season with salt and pepper. (Potatoes can be made 2 hours ahead. Let stand at room temperature. Rewarm over low heat, stirring frequently.)

Adapted from Bon Appétit

Tips:
-If you happen to make this in summer months, and have fresh tomatoes on hand (I like Romas), half the tomatoes, and roast them in the oven for about an hour at about 300 degrees. Season with salt and pepper. Set aside. When plating the dish, Spoon mashed potatoes onto a large platter, then place roasted tomatoes, cut side down, on top (scattered over the potatoes). Spoon short ribs and remaining vegetables with some of the juice onto the mashed potatoes.


Creme Fraiche Mashed Potatoes on FoodistaCreme Fraiche Mashed Potatoes

11/29/09

Thanksgiving Pasties


Leftovers. Don't you love Thanksgiving leftovers? Saturday, while planning Sunday dinner, I thought about all of the leftovers in my refrig. What could I make with all of the leftovers?? Are you wondering how many times can I use the word leftover in this post? Turkey pot pie? Hmmm. No, that wouldn't use up the leftover stuffing. And I just made pot pie two weeks ago. How about a hot turkey sandwich? Or some turkey and stuffing casserole (popular in the 70's)? Nothing really sounded appealing.
Then a thought popped into my head. How about a Cornish Pasty (um yes, pronounce this like past-ey, not pastie). You know the little turnovers sold everywhere in England, originating in Cornwall, England. Usually made with (raw) beef, potatoes, onion and kind of a thick, sturdy (made with lard) crust. Couldn't we just combine our leftover stuffing, turkey and gravy- make a pastry out of my favorite pie crust recipe, fold it up, bake it and call it dinner?? It was easy. Within 30 minutes of returning from church, 6 man sized pasties were coming out of the oven. Served them up with a little leftover gravy on top and a spoonful of cranberry sauce. Leftover, of course. Yum. That's eight, in case you lost count.


Thanksgiving Pasties

Turkey, chopped, white or dark meat about 1/3 cup per pasty
3 cups stuffing
gravy about 3/4 cup for filling, more for serving
1 1/2 cup grated Monterey jack cheese (optional)

Pie Crust:
2 cups flour
1 teaspoon salt
1 cup shortening ( I like Butter Flavor Crisco)
1/2 cup cold water
1 egg, for glaze

Mix flour and salt in bowl. Cut in shortening with pastry blender or knives. Add water. Stir with fork until water is absorbed and ball forms. Flour surface and rolling pin. Divide into 6 even pieces. Roll each portion into approximately 6- 8 inch circle.

Preheat oven to 425 degrees, 400 if using convection.

Heat the stuffing in microwave for about 2 minutes until hot. Heat gravy. Place about 1/2 cup stuffing onto each pastry. If you imagine cutting the circle of the pastry in half, spread the filling toward the outside half of one side of the dough. Layer the stuffing, chopped turkey, and drizzle with a little gravy (about 2 tablespoons per pastry). Add a little grated cheese, if desired. Repeat until all of the pastries are filled. Crimp edges and transfer to ungreased baking sheets. Place three pastries on each baking sheet. Beat egg and brush tops of pastry with egg.

Bake for about 15 minutes, turning pan once to insure even browning. Remove and serve with gravy and cranberry sauce.

Tips:

-If you don't want to make your own crust, Puff Pastry or even store bought :( crust will work.

10/26/09

Sheri's Pesto Veggie Lasagna


A few weeks ago Sheri made this dish for a soccer team dinner. The girls on the team loved it. I figured if they loved it, maybe my boys would love it too. So I got to work on Saturday night, and made a pan for Sunday. You know, the day of rest. All of those veggies, layers of cheese, ricotta, mozzarella, Parmesan. Tomatoes. Pesto. Yum, the pesto totally sets this dish apart from other veggie pasta dishes. Gave the ricotta layer a nice flavor boost. As I was putting it together, I thought- am I going to hear crying from the boys (like they are girls) when they discover this is an all veggie lasagna? Arrrrrgh. So, being the perfect mother I am, and part psychic, I made half vegetablearian (I know, not a word) and half sausage. Sunday comes. I bake up the dish. What is this, they ask? I tell them. Uh. "NO MEAT?" They say.
"No, it's a veggie lasagna and you are going to love it" I say. They are all giving each other "the look". Finally I admit I hedged and made half with meat. I tell them if they would try the veggie side, they would love it! Grant looks at me and says (in his Neanderthal way):
"We like meat because we are Carnivores."
Oh, really. Wow. Revelation.


Sheri's Pesto Veggie Lasagna

Sauce:
1 sweet medium onion
1 tablespoon olive oil
1-2 cloves of garlic, chopped
2-15 oz cans of tomato sauce
1- 6 oz can tomato paste
1- 28 oz can crushed tomatoes
2 tablespoons oregano
2 tablespoons basil
2 teaspoons thyme
1 teaspoon sugar
pepper
6 drops hot pepper sauce, optional

Other filling ingredients:
8-10 mushrooms, medium, washed and sliced
1 sweet onion, chopped
1 red pepper, chopped
3-4 cups fresh spinach, washed
1 tablespoon olive oil
1 3/4 cups Ricotta cheese
1 egg
7-8 oz pesto (Sheri uses about 1 1/2 cups)*
1 lb fresh mozzarella, sliced
1/2 cup fresh Parmesan, grated
1 cup grated mozzarella, for top of lasagna
1 box no boil lasagna pasta

Combine olive oil and one chopped onion in large saucepan over medium high heat. Cook just until onion is softened about 5 minutes. Add rest of ingredients, turn down heat and simmer while preparing rest of dish.
In another skillet, heat olive oil over medium high heat, add mushrooms, saute until lightly browned. Remove from pan and place in bowl. Saute chopped onion and red pepper until softened, about 5 minutes. Add onion back to skillet, and toss in spinach. Season generously with salt and pepper. Cook for about 2 minutes, or until the spinach starts to lose shape, but is not completely wilted. The spinach will continue to cook in the oven. Remove from heat and set aside.
In a medium size bowl, whisk together the Ricotta cheese, egg, and pesto. Slice the fresh mozzarella and set aside.
Spray a 9x13 pan with Cooking spray. Cover the bottom of the pan with about 3/4 cup of the sauce. Spread around until sauce is covering the bottom of the pan. Place a layer of the lasagna noodles across the pan. Do not overlap the noodles, they will expand when baking. Place the pasta three across. There will be a little gap between the edge of the pasta and the pan. Layer the lasagna as follows:

pasta
1/2 of ricotta mixture
1/3 of remaining sauce
1/2 of vegetable mixture
1/2 of sliced cheese
3 more sheets of pasta
repeat layers and end with sauce layer on top

Cover pan with foil. Place in refrigerator overnight if using next day, or you may freeze at this point. When ready to bake, remove from refrigerator, and let sit on counter for 1/2 to 1 hour. Preheat oven to 350 degrees. Bake for 30 minutes, remove foil. Bake an additional 15 minutes until hot and bubbly. Top with remaining 1 1/2 cups of combined grated Parmesan and mozzarella. Broil or set oven to convection bake until cheese on top is slightly golden.
Remove from oven, and let sit for 15 minutes before slicing.

Tips:
-*Sheri uses pesto to give more flavor to the veggie based lasagna. I loved it. She buys the Costco pesto and uses about half of the container, which I love, but didn't have any in my fridge and didn't want to make another trip to COSTCO just for pesto, cause you know then it would have cost me $100 (at least) for that one jar of pesto, bc you can't buy just one item at Costco. Instead, I bought a 7 oz container of Butoni pesto in the refrigerated section at my local grocery.
-If you aren't into the no-bake pasta( I like it because it is thinner than the traditional style lasagna that needs boiling) you may use traditional style and boil the pasta. Assemble and bake the same.
-If freezing the dish for later baking, cover with plastic wrap and foil. Freeze. Remove from freezer when ready to bake. Remove plastic wrap and replace foil. Bake for about 1 hour 30 minutes. Remove foil about last 30 minutes of baking. Top with last layer of cheese just before broiling.

10/5/09

Sara's Sunday Pork Tenderloin with Mushroom Gravy


Want a slamdunkeveryone'sgonnaloveit Sunday dinner recipe? I've made this a few times for my family. They always love it. I took this to an extended fam dinner last Sunday, and served it with Sheri and Amity's delish fresh Idaho mashed potatoes. The result - tripled the recipe and 22 people later - no leftovers. It's a no fuss- brown, chop, slide into the oven and bake recipe. This recipe comes from the lovely and talented Sara (yes, Sara's Salmon Sara).


Sara’s Sunday Pork Tenderloin with Mushroom Gravy

2-1 lb. Pork Tenderloin (not pork roast)
1/2 cup butter
1/4 cup olive oil
1 1/2 lb mushrooms, washed and quartered
1 onion, chopped
1/4 cup flour
2 cups chicken broth
1 tablespoon Worcestershire Sauce
1/4 cup fresh thyme, optional
salt and pepper

In a Dutch oven, brown pork in melted butter and oil. Remove from pan. Sautee mushrooms and onion. Season with salt and pepper. Cook for about 5 minutes on medium high heat, tossing so mushrooms brown a bit. Reduce heat, add flour and stir until smooth. Add chicken broth, Worcestershire and fresh thyme. Stir. Place meat back into pan. Cover with foil and bake at 350 degrees for 1 ½- 2 hours*.

Tips:
-I usually turn off the oven after 2 hours cooking time, then let meat sit in the oven, covered until ready to cut and serve. Last Sunday, it was in the oven for about 1 1/2 hours past cooking time, and then on the counter covered for about another hour. It never dries out, and always falls apart when cutting.
-I have cut the amount of butter by half, and the recipe still works. Don't cut the amount of mushrooms or onions, unless you substitute another vegetable that yields a high amount of water, or there won't be enough gravy to keep the meat moist.
-Costco sells Pork Tenderloin in a two pack. Each sleeve has two tenderloins, so 4 tenderloin per purchase, enough for a double recipe. Oh, and the happiest place on earth (what Corrine calls Costco) also sells mushrooms, whole in a 1 1/2 lb package. I use a mixture of their white and brown mushrooms.

9/27/09

Beef Enchiladas with Roasted Tomatillo Sauce and Fresh Peach Salsa


Whenever I ask my kids what they want for a birthday meal, or any meal for that matter, the answer I get most often is: enchiladas. I loved the Santa Fe Enchiladas we made a while back. The sauce was a little on the spicy side, and took a while to make, but worth every minute. This recipe calls for lots of tomatillos. Little, round, paper-like wrapped green things in the produce section of the grocery.


I added a few roasted Anaheims, because I love the flavor. The texture of this sauce was totally different than the Santa Fe's. If you like a smoother texture, go with the Santa Fe enchiladas. These are seedier. Tomatillos=little seeds. For a little heat- I used one Serrano chili, you can add two if you like to have your mouth on fire while enjoying your a meal. Remember to use gloves, or a plastic sack over your hands to remove the seeds. Don't say I didn't warn you. And don't touch your eyes. Can you tell I'm a MOM?? Oh - and the peach salsa - enough with the peaches already! I know that's what you are thinking. You know how I love fruit with salty and spicy. This was my way to slip in the sweet and use up a few more peaches. Try these, I know you're going to love them.


Beef Enchiladas with Roasted Tomatillo Sauce

1 small red onion, halved
2 pounds tomatillos, husked and rinsed
3 large anaheim peppers
1 Serrano chili pepper, stemmed and seeded
1 cup of chicken broth
2 tablespoons sour cream, optional
kosher salt
sugar
16 corn tortillas
6 cups shredded chuck roast*
6 1/2 cups shredded cheese- jack, mozzarella or cheddar/jack combo, divided
1 cup fresh cilantro, chopped and divided
2 tablespoons of olive oil
3/4 crumbled queso fresco or crumbled feta

Preheat broiler. Slice half of onion into thin rings and set aside for garnish. Place the other onion half, tomatillos and chilies on a foil lined baking sheet. Broil until all of the vegetables are softened and slightly browned about 7-10 minutes, turn if needed. Transfer the vegetables to a bowl, and chop with hand immersion blender, or transfer to a blender and blend in batches until smooth. Add chicken broth and sour cream, puree. Season with salt and a dash of sugar. Set aside.

Prepare 2- 9x13 pans for cooking. Spray both pans lightly with Pam, and put about 1/2 cup of the sauce mixture in each pan. Spread mixture around so it covers the bottom of the pan.

Stack the tortillas and wrap in a damp paper towel in microwave and heat just until warm and soft, about 1 minute. Keep covered. Toss the meat with 4 cups of the grated cheese and 1/2 cup chopped cilantro. Place some of the meat mixture in the middle of a tortilla, roll up and place seam side down in the prepared 9x13 pan. After filling all of the tortillas, brush with a little olive oil and broil until golden about 2-3 minutes. Pour the remaining sauce over the enchiladas and top with remaining cheese. Reduce oven heat to 350 and bake for about 15-20 minutes. Garnish with sliced red onion, and queso or feta cheese and fresh cilantro. Serve with fruit salsa.

Tips:
-This recipe makes 2 9x13 pans, and can easily be halved.
- I used a 3-4 lb roast. Early in the day, or the next time you cook a roast for dinner, throw in another one for an additional meal. Place roast in pan, fat side up (if not trimmed), season well. Add about 1/2 cup water (around the sides of the meat, not poured over the top), a whole sliced onion on top of the meat and cook low and slow - in crock pot for about 8-10 hours or in a 275 oven in heavy dish covered with foil for about 8 hours. Remove from oven, discard any fat, shred or chop meat when cooled a bit. If making before day of use, cook then refrigerate, or freeze for later use. Save the broth from meat in a jar and freeze to make gravy or soup base.
-If making enchiladas ahead and baking later in the day, wait to cover the enchiladas with sauce until just before baking. Bring pan of enchiladas to room temperature, then proceed with broiling instructions. Cover with sauce and proceed with baking instructions. Otherwise, the enchiladas will absorb too much of the sauce before baking.


Fresh Peach Salsa

2 Peaches, peeled, pitted and chopped
1/2 cup chopped cilantro
1/2 cup chopped red onion
1 avocado, chopped, optional
2-3 tablespoons of fresh lime juice
pinch sugar
salt
pepper

Mix together all ingredients in bowl. Season to taste.