Showing posts with label side dish. Show all posts

2/28/15

Smashed Potatoes and Buttermilk Fried Chicken


What says comfort more than fried chicken? This dinner takes just a few minutes to cook after the chicken soaks in buttermilk. I usually place the chicken in the buttermilk early in the day (If the chicken is frozen, I just plop it in the buttermilk as-is.


If you are a little skeptical about cooking fried chicken you're going to love this recipe. It's easy to put together and you can fry batches and then place the cooked chicken in the oven to keep warm. I put the potatoes in the oven about an hour before eating dinner. Then just steam the veggies while you're saying a blessing. What could be easier than this? Ok, besides KFC.


And the leftovers (if you have any)?
You might be tempted to give up your firstborn for a piece of this cold leftover fried chicken.
I'm serious.


Southern Buttermilk Fried Chicken with Smashed Potatoes
original recipe adapted from Mad Hungry  originally posted here

Chicken:
1 quart buttermilk or milk
2 tablespoons Tabasco or other hot sauce
about 4-6 chicken breast halves
1 cup all-purpose flour
1 1/2 teaspoons coarse salt, plus a little more for sprinkling
1/2 teaspoon freshly ground black pepper
1/4 teaspoon cayenne pepper
1/2 cup vegetable oil

Smashed Potatoes:
12 small red potatoes, or white will also work
olive oil
coarse ground salt
ground pepper
butter

For potatoes:
Pre heat oven to 350 degrees.
Wash and dry all potatoes, remove any eyes from potatoes with paring knife. 
Grease a 9x13 or jelly roll pan with cooking spray. 
Rub each potato with a bit of olive oil. Sprinkle with salt.
Place pan in oven and bake potatoes for about 1 hour  or until knife inserted in center of potato easily goes through potato. 
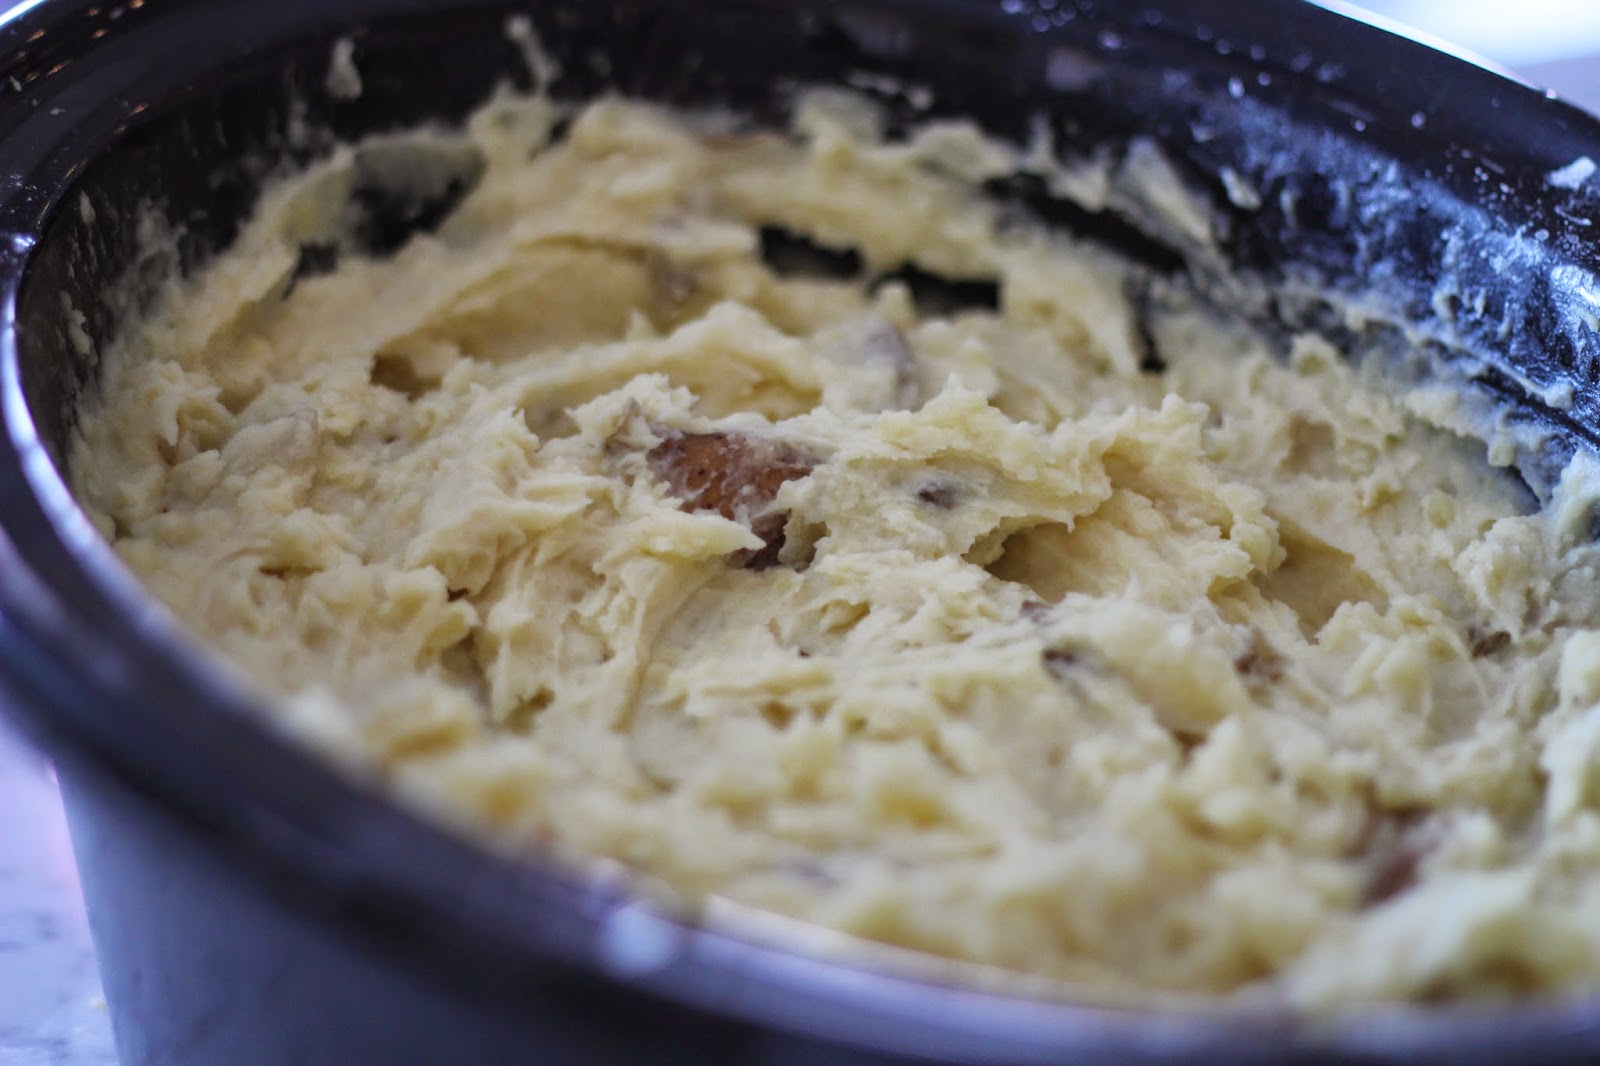
Remove and Smash each potato with a fork. Sprinkle each potato with a little more salt and pepper. Drizzle with additional olive oil. If desired, spoon about a teaspoon of butter on each potato, top with Parmesan cheese, grated cheddar, chopped green onions if desired. Or just serve with olive oil and salt! Keep warm in 200 oven until ready to serve. 
Tips:
-Use whatever amount you need for this recipe. Usually, about 2-3 small potatoes per person. 

Early in day:
In a 9x13 baking dish or gallon sized Ziplock bag, stir together the buttermilk and Tabasco. Place the chicken in the liquid mixture and leave as long as possible. (I soaked the chicken overnight. Place in refrigerator.)

When ready to cook chicken:
In a plastic or paper bag combine the flour, salt, pepper, and cayenne.
Shake the chicken pieces two to three at a time, in the flour. Repeat with the remaining chicken.
In a skillet heat one half inch of oil over medium high heat. Test with a tiny bit of chicken. If it bubbles immediately, it is hot enough.
Place the chicken into hot oil. Distribute as many pieces as will fit in a single layer in the pan, leaving one half inch between pieces. Leave to fry undisturbed for about seven minutes. Lower the heat as necessary to prevent excess browning. The oil should continue to bubble steadily. Turn the pieces and cook for an additional seven to ten minutes.
Remove to a plate lined with paper towels to drain. Repeat process to cook remaining chicken. To keep first batch warm, place on a rimmed baking sheet in a 200 degree oven.

Tips:
-The original recipe calls for two cups of oil. I used about a quarter to a half inch of oil in the bottom of the pan.
-I used 4-5 boneless chicken breast halves. 
-This was delicious served cold as a leftover the next day.

12/22/14

Loaded Twice Baked Potatoes


I fell in love with twice baked potatoes as a kid. I still remember my mom and dad  making twice baked potatoes for the first time. They had the old BH&G cookbook (with the red and white checked cover) opened up on the counter. Dad reading the recipe to Mom, while they both worked on adding ingredients together.  That creamy mashed filling, stuffed back into a baked potato jacket was such a treat.
I still love this recipe for two reasons:
One- Who doesn't love a baked potato combined with butter, cheese, and sour cream?
The answer is NO ONE.
The second reason to love this dish- it can be made ahead and stored in the fridge until you're ready to bake and serve. Because of the creamy filling, Loaded Twice Baked Potatoes taste just as good several days after they are made. The addition of the sour cream and half and half keeps the filling perfect for reheating.  This dish is perfect for busy cooks who want to make ahead and enjoy the holiday.

Want a little step by step? 


Bake the potatoes. Cut the top fourth of the potato off, 
discard, then scoop out the insides. 
I was probably a little aggressive with the scooping. 
It's best to leave a little more of the potato attached to the skin. 


Make the filling as directed in the recipe, then carefully fill the skins. 


Yum.


Top with cheese just before the second bake.
On this potato, I  topped it with Smoked Gouda  and Cheddar.


What else are you serving for Christmas dinner? 


My friend Linda at The Organic Kitchen is dedicated to creating healthy and delicious recipes for home cooks.  Her recipe for Pear and Brie Salad with Honey Champagne Vinaigrette  is simple and fresh  and a perfect healthy addition to your holiday meal.  Check out The Organic Kitchen for instructions on how to arrange this festive salad. I love it paired with  Ham with Grilled Pineapple and Pomegranate Pineapple Glaze, and Loaded Twice Baked Potatoes. Steam some fresh green beans, and you've got a beautiful colorful, easy to serve meal.


Loaded Twice Baked Potatoes
A Bountiful Kitchen

The measurements of butter, half & half and sour cream may vary depending on the size of potato used)

6-7  Russet potatoes about 3/4-1 lb each
1/2 cup butter, room temperature
1  cup half and half, warmed for about 1 minute in microwave
1-2 teaspoons salt
1 teaspoon pepper
1- 1 1/2 cups sour cream
3 cups grated cheese (I use  Medium Cheddar or Co Jack)

Wash and pat potatoes dry. Pierce the potatoes with a fork about three times to allow heat to prevent bursting of skins.
Preheat oven to 350°F. Bake potatoes on rack for about 1 hour 15 minutes, or until knife is easily inserted in center of potato. Remove from oven and place on cookie sheet or cutting board.
Cut the top fourth of the potato off  lengthwise and discard. Using a dishtowel to cover your hand, hold the potato and  gently scoop the hot potato out of the skin and place in a large bowl. Place the potato skins back onto the cookie sheet. Continue until all of the potatoes are scooped into the bowl.
Add the butter, warmed  half and half, salt and pepper. Using a potato masher, smash the potatoes until the half and half and butter are incorporated. Add the sour cream and grated cheese, mash again. Taste to see if the mixture needs more salt and pepper.
The potatoes should be very creamy and soft. If they are not, add additional half and half or sour cream until soft (a few tablespoons at a time).
Using a large spoon, fill the potato skins. Heap the mixture up in the middle of the potato. Top with additional grated cheese (if eating right away, if saving for later, do not top with cheese at this time). If eating right away, bake in oven for about 15-20 minutes, uncovered.
Serve immediately, or keep warm in oven until serving.
Serving size is one potato per person.

Tips:
-This recipe varies depending on the size of the potato. If the potatoes are large, you may use more half and half and sour cream to achieve the desired consistency. You're looking for the same consistency you will find in a creamy mashed potato.
-If making ahead, stuff the potatoes after making the mashed mixture. Cover with plastic wrap and place in refrigerator. When ready to cook, uncover and let sit on counter for about 30 minutes. Bake in center of oven for about 30  minutes at 350 degrees or until heated through. Remove from oven during last 10 minutes of cooking and top with grated cheese. place back in oven and let cheese melt.
-If you are making this for young children or others with smaller appetites, you may use two small potatoes in place of one large.
-I always use Russets. Their skins are tougher than any other potato and will hold up to being baked, scraped and then re baked. You may rub the skins with oil for a nicer appearance and better texture for eating after the second bake.
-If you have any extra filling, place it in a bowl and reheat later.

11/12/14

Savory Yams with Bacon, Cream and Fresh Thyme and Harmons Giftcard Giveaway Winner!

photo credit Becky, Vintage Mixer


A few weeks ago the Harmons bloggers gathered and had a little pre-Thanksgiving meal. It was an afternoon of  photo taking, discussing our favorite holiday dishes, and of course, feasting on good food. We all went away stuffed and excited to share new recipes with our readers!


Savory Yams with Bacon, Cream and Fresh Thyme


photo credit, Caroline Drake, Armelle Blog
We partnered with Harmons to offer five, yes, five $100 gift cards just in time for holiday grocery shopping! Harmons provided the gift cards, and we've provided recipes to make this your best holiday season, ever.


photo credit- Becky at Vintage Mixer

For our Harmons gathering, I made Slow Cooker Mashed Potatoes and Savory Yams with Bacon, Cream and Fresh Thyme (recipe below).
You'll want to follow each of the Harmons bloggers for multiple doses of amazing cooking and general family/lifestyle ideas each day! The other dishes that rounded out our meal and links to recipes are listed below. Don't forget to scroll to the bottom of this post for multiple chances to win a $100 giftcard!


Fresh Cranberry Orange Relish from Becky at Vintage Mixer
love, love, loved both of these recipes. 
photo credit Becky, Vintage Mixer


photo credit Caroline Drake, Armelle Blog


Chocolate Mousse Pie from Caroline at Armelle Blog
made with an olive oil crust. On my list of pies to make this month.

photo credit, Caroline Drake


Sesame Green Beans with Bacon and Chestnuts 
from Rachael at LaFujimama
pretty sure this will be on my holiday table!


Sausage Herb Stuffing from Jesseca at One Sweet Appetite
can't wait to try this, stuffing is my favorite. 


photo credit Caroline Drake, Armelle Blog

Last, but not least is my recipe for Savory Yams with Bacon, Cream and Fresh Thyme.  This recipe is rich, without being over the top. So often yams are used in a sweet dish at holiday time. I thought creating a dish that used savory flavors would be perfect for our holiday gatherings. I've made it three times in the past three weeks, and it's been a hit every time.
Fifteen more days til Thanksgiving!
Can't wait.


Savory Yams with Bacon, Cream and Fresh Thyme
A Bountiful Kitchen
print recipe


5-6 medium size yams or sweet potatoes (about 8-10 cups total)
1/2 lb bacon
1 tablespoon olive oil
1 small onion, chopped (about 1 cup)
1 cup heavy cream
fresh thyme, about 4 tablespoons stripped from stems, plus a few sprigs for garnish after cooking
salt and pepper

Wash yams, place in large pot. Cover with cold water. Bring water to boil and cook for about 30 minutes, or until barely fork tender.
Meanwhile, chop bacon and cook until crisp, drain grease and set aside.
Wipe out pan used to cook bacon, add 1 tablespoon of olive oil and cook until soft and slightly golden.
Remove yams from boiling water. Drain and set  yams on counter and let cool a bit. Peel and slice or cut into small chunks.
Place cut up yams in a greased 9 x 13 or similar size baking pan. Sprinkle with fresh thyme.
Drizzle fresh cream onto yams. Sprinkle with cooked onions and bacon.
Cover and bake for about 30 minutes at 350 degrees, or place in refrigerator until ready to bake.
May be made up to 3 days in advance. Let sit on counter when removing from refrigerator for about an hour before baking.
Garnish with additional fresh thyme before serving.


Click to Copy Embed Code

11/6/14

Slow Cooker Mashed Potatoes


If you are like me, no matter the size of your kitchen, when Thanksgiving rolls around, it never seems big enough. There are never enough cooking surfaces, oven space or counter space to fit all of the dishes you are hoping to serve piping hot, at the same time for your Thanksgiving feast.
So many dishes, so little space.
Enter the humble and oft forgotten slow cooker. Dump the potatoes in,  add a little water and salt. and in about 4 hours. BAM. You're in business.


It really is that simple.
Amazing.
Why didn't I think of this years ago??
Why doesn't my keypad have multiple emojis so I can insert the - bewildered, embarrassed, and now totally happy emoji  face parade??!! I'm sure you can picture those faces.
Happy days are here again my friends.
One less dish to keep warm on the stove or in the oven!
Happy cooking.
Here's a fantastic gravy recipe to go with your mashed potatoes- Simple Pan Gravy
PS are you following on INSTAGRAM? Look to the right, see the icon?  If not, do it. now. You'll be glad you did. Next week, I'm partnering with Harmons and 4 other bloggers to bring you original recipes for a delicious holiday meal AND  a big giveaway just in time for your multiple trips to the grocery store!


Slow Cooker Mashed Potatoes
A Bountiful Kitchen
print recipe

5 lbs red potatoes, scrubbed, cut into fourths (I leave the peels on)
3/4 cup water
2 teaspoons salt
1/2- 3/4 cup butter, cut into tablespoons
half and half, about 1 1/2 -2 cups
1 cup sour cream (optional)
pepper and more salt if needed

Place potatoes in large 6-7 quart slow cooker or crock pot. Pour in water. Sprinkle salt over potatoes.
Place lid on slow cooker and set on high heat. Don't lift the lid! Cook for about 4 hours.
Leaving the insert (bowl) in the slowcooker do the following:
Do not drain the potatoes. Place the butter in with the potatoes. Using a potato masher, mash the potatoes and butter together.  Add the half and half (about 1 1/2 cups). Continue to mash until desired consistency. Add the remaining 1/2 cup of half and half,  if needed.  Add sour cream (if using) and mix well. Taste and add more salt and a little pepper if desired.
Turn the heat to warm and keep warm until ready to serve for up to two hours. If needed, just before serving, add additional milk or half and half and fold the potatoes

Tips:
-Do not over mix, or beat the potatoes for a long time with a mixer. The potatoes will  take on a gluey type texture.  It is almost impossible to over mix the potatoes with a potato masher.  If you don't have one,  I highly recommend buying one.  I've had mine for at least 25-30 years,  and it's still going strong.
Click on the photo below to order yours for just a few dollars:


8/13/14

Margherita Pasta (updated)


It's summer and if you're like me, you're thinking of every way to avoid turning on the oven, but not eat a sandwich or salad. Again. You're in luck. This recipe involves the stove, but only for a few minutes.
I originally posted this recipe in 2010, but have updated it a bit. Spaghetti Margherita is a simple and straight-forward dish. While the pasta is cooking, you can throw together the sauce.

Some people think- Margherita Pasta? Is that alcoholic? The answer is no. Legend (some question this) says that Pizza Margherita was created in the late 1800's, and named for Queen Margherita to reflect the colors of the Italian flag. The pasta variation followed.

I know I say this all of the time, but EVERYONE loves this dish. When I make it for my boys, they love it, even though it isn't a meat dish. Now that's saying something. Since they have never jumped aboard the "meat is not all that good for you and you should eat it sparingly" train.
Lazy summer days mean lazy summer nights.
This dish fits perfectly with that theme.


Spaghetti Margherita (updated 8/2014)
A Bountiful Kitchen
print recipe

3/4 lb. spaghetti, cooked "al dente", drained
¼ cup extra virgin olive oil
2 tablespoons butter (optional) optional, but highly recommended for flavor
1-2 cloves garlic, minced
2 lbs. Roma tomatoes (about 10-12) coarsely chopped or grape tomatoes
1 cup fresh basil leaves, chopped
1 teaspoon salt
1 teaspoon sugar
1 teaspoon fresh ground pepper
1/2 lb. fresh mozzarella, cut into 1/2 inch cubes
½ cup grated Romano or Parmesan cheese
additional basil leaves for garnish

Cook pasta. Set aside, or while pasta is cooking prepare sauce.
In large skillet, heat oil and butter over low heat. Saute the garlic until fragrant over low heat, about 1 minute. Add tomatoes, sugar, salt and pepper. Cover and cook for 10 minutes. Add basil, and pasta to pan with tomatoes. Cook for 2-3 minutes, just until all pasta is heated through. Just before ready to serve, pour into serving bowl, toss with fresh mozzarella and grated cheese. Serve at once with additional grated cheese, and more fresh basil if desired.
Serves 4 as a main dish, 6 as a side.

Tips:
-Fresh Mozzarella differs from mozzarella that is sold in most cheese cases at grocery stores. Some grocery stores, such as Harmons in Utah, make their own fresh mozzarella daily.
Make sure you are purchasing fresh mozzarella for this dish. Fresh Mozzarella is made from whole milk in small batches, usually round in shape and surrounded in liquid.
-If you aren't growing basil in your back yard, you can purchase fresh basil at farmers markets, grocery and garden stores. One plant will yield fresh basil for several recipes this summer.

7/22/14

Dutch Oven Molasses Baked Beans

molasses dutch oven baked beans


Summer is the best time to break out the Dutch oven and make a pot of Molasses Baked Beans. I've been making variations of this recipe for years. It's always a crowd favorite and a perfect accompaniment to any barbecue meal. You can make these while out camping or even in your backyard.
I've included a little step by step photo tutorial, because I know how much you love a good picture story. Have a Happy 24th of July (Pioneer Day in Utah) !


things are heating up. bacon and onions cooking...
molasses, yellow mustard, brown sugar, ketchup. measure them out. get ready to dump.

add the beans. 
molasses...


mustard 

brown sugar and ketchup. are you bored yet? my friend Melinda tells me she likes the step by step.  

don't forget the hot sauce.

stir. with a wood spoon, to get that pioneer spirit. 
Place the lid on the pan.  you don't need one of these fancy tools, but we bought one after many years of having dutch ovens and we think it's pretty useful. large pliers also work. gloves are good too. 

cook for about 40 minutes or until bubbly. this is how they'll look when done. Nice toes, Brookie.


A side note to my story.
Some of you are very observant. You email or leave a comments about details in photos. Such as- why do there appear to be SO MANY COALS under the Dutch oven????   Because friends, this is why. My husband thinks that whenever we pull out the Dutch ovens, the cooking expertise shifts from me, to him. He insists on placing half of the bag of briquettes into the chimney we use to heat up the coals. Even if it's a 50 lb bag. Not really, but it seems that way.
You know how men are. Fire is good. More fire is twice as good!
Anyway. He is an out of doors expert, and I am not, that is a fact.
But I'm a cooking type of person, and he is not. Also a fact.
So we always have "words"  when we attempt Dutch Oven cooking.
The convo usually goes like this.
G: I am doing this.
Me: okay. (as I watch him heat about 50 coals)
G: I've got this.
Me: You're using too many coals.
G: No I'm not.
Me: yes you are.
G: Who is doing this me, or you?
Me: I'm going inside.
So, yes. in the photos, you will see lots of coals. More than I tell you to use in the recipe. More than the Scouting Magazine article titled "Dutch Oven Cooking 101" advises you use.
But hey.
What do the Scouts know?
I've got to hand it to him.
That's one good looking pan of beans.


Dutch Oven Molasses Baked Beans
A Bountiful Kitchen
print recipe

1-12 or 14 inch dutch oven ( I believe we used a 14 for this recipe)
about 26-30 briquettes

1 lb bacon, chopped
1 large onion, chopped about 2 cups
1- #10 can pork and beans ( about 7 lbs 10 oz)
1 1/2 cups ketchup
1 cup packed brown sugar light or dark
1/2 cup mustard
3/4 cup molasses
hot pepper sauce, to taste

Light briquettes, follow package directions.
Place about 10 hot briquettes in a circular pattern on the ground. We like to use an old metal pan under our dutch oven. Place the dutch oven on top of the briquettes.
Place the chopped bacon and onion into the dutch oven. Cook until the bacon is slightly crisp and onions are softened. Drain any excess grease. Don't worry about removing every bit of bacon grease.
Add the remaining ingredients,  stir.
Place the lid on the beans and using a pair of tongs, place about 16 briquettes on top of the lid and leave 10-14 under the dutch oven.
Let the beans cook for about 40 minutes or until bubbly and hot. This will vary in cooking time depending on how much wind there is, the amount of coals you use, the temperature of the coals, etc.
If you feel the beans are cooking too fast, remove some of the coals.
When ready to serve, carefully remove lid, so the ashes do not get into the beans. Sometimes, if our beans are cooked and very hot, we dump the ashes, and simply leave the lid on till ready to serve.
Serves about 20-25 as a side dish

Tips:
-There are many sources for Dutch Oven cooking online. Here are a couple :
Scouting Magazine (Dutch Oven Cooking 101)
Camp Cooking Outdoors
-You may use any brand of beans, Van De Camps is a brand found in most grocery stores. I used a brand I purchased from a wholesale food distributor.
-This recipe may also be made in the oven. Cook the bacon and onions, drain the grease and add the remaining ingredients. Bake at 375 for one hour.