Showing posts with label kid favorite. Show all posts

2/10/14

Cutler's Famous Glazed Sugar Cookies (step by step)


If you live in Davis County, Utah, you know about Cutler's Cookies. We have lived in Bountiful for close to twenty years and have had the pleasure of being a Cutler's customer for as many years.


I'm honored to be the only blogger Curt and his wife Nancy have worked with in sharing recipes both in classes and online.  Every time I post one of their recipes, people from near and far away comment about craving one of their signature sugar cookies. Cutler's sugar cookies are soft, puffy, perfectly shaped and always frosted with either a generous amount of buttercream or topped with a glaze, flavored with a hint of almond.

topped with glaze


topped with buttercream frosting.


I originally posted Curt's recipe for Sugar Cookies with Butter Cream Frosting here, and later added the glaze recipe to the post after numerous requests. Since there were so many requests about the glaze, how to make it, how it is applied, etc., I thought you might like to see the method Cutler's uses to glaze the cookies a whole pan at a time. Their secret is a stainless steel pan you'll find in the hardware store. It looks like this and costs just a few dollars- some call it a trowel pan or a spackle pan, I think it looks like a mini-trough.

mini-trough for glazing
Curt came over last week to show us step by step how the glaze is applied. We baked up some cookies he made in the Cutler's kitchen and also mixed up a batch in the Bountiful Kitchen.  Melanie (quality control specialist and bff), my daughter Corrine (who took most of the photos so I could get busy with the flour) and the cutest grand baby you've ever met, Anabelle, aka: Yanners, Yani, Yippers, The Yiplet (advocate for anything pink, sparkly and sugar filled) were on hand to join in the sugar fest. Cathy, cookie making expert  from Cutler's, also joined in the fun.


Yani, testing the finished product
she approved

Frosting or glazing the cookie is a matter of preference. Some are buttercream frosting fans (me). Some are glaze fans (me again).  If I have to choose just one, I'm going with buttercream every time. But after eating these glazed cookies fresh out of the spackle pan, I must say, I'm now a glaze lover too.


Here's a step by step from the Cookie King himself, Curt Cutler.
Step one. Get all of the ingredients together.

cookie making, Cutler style

when measuring flour, scrape after adding to measuring cup to insure an accurate measurement

line baking pans with parchment paper

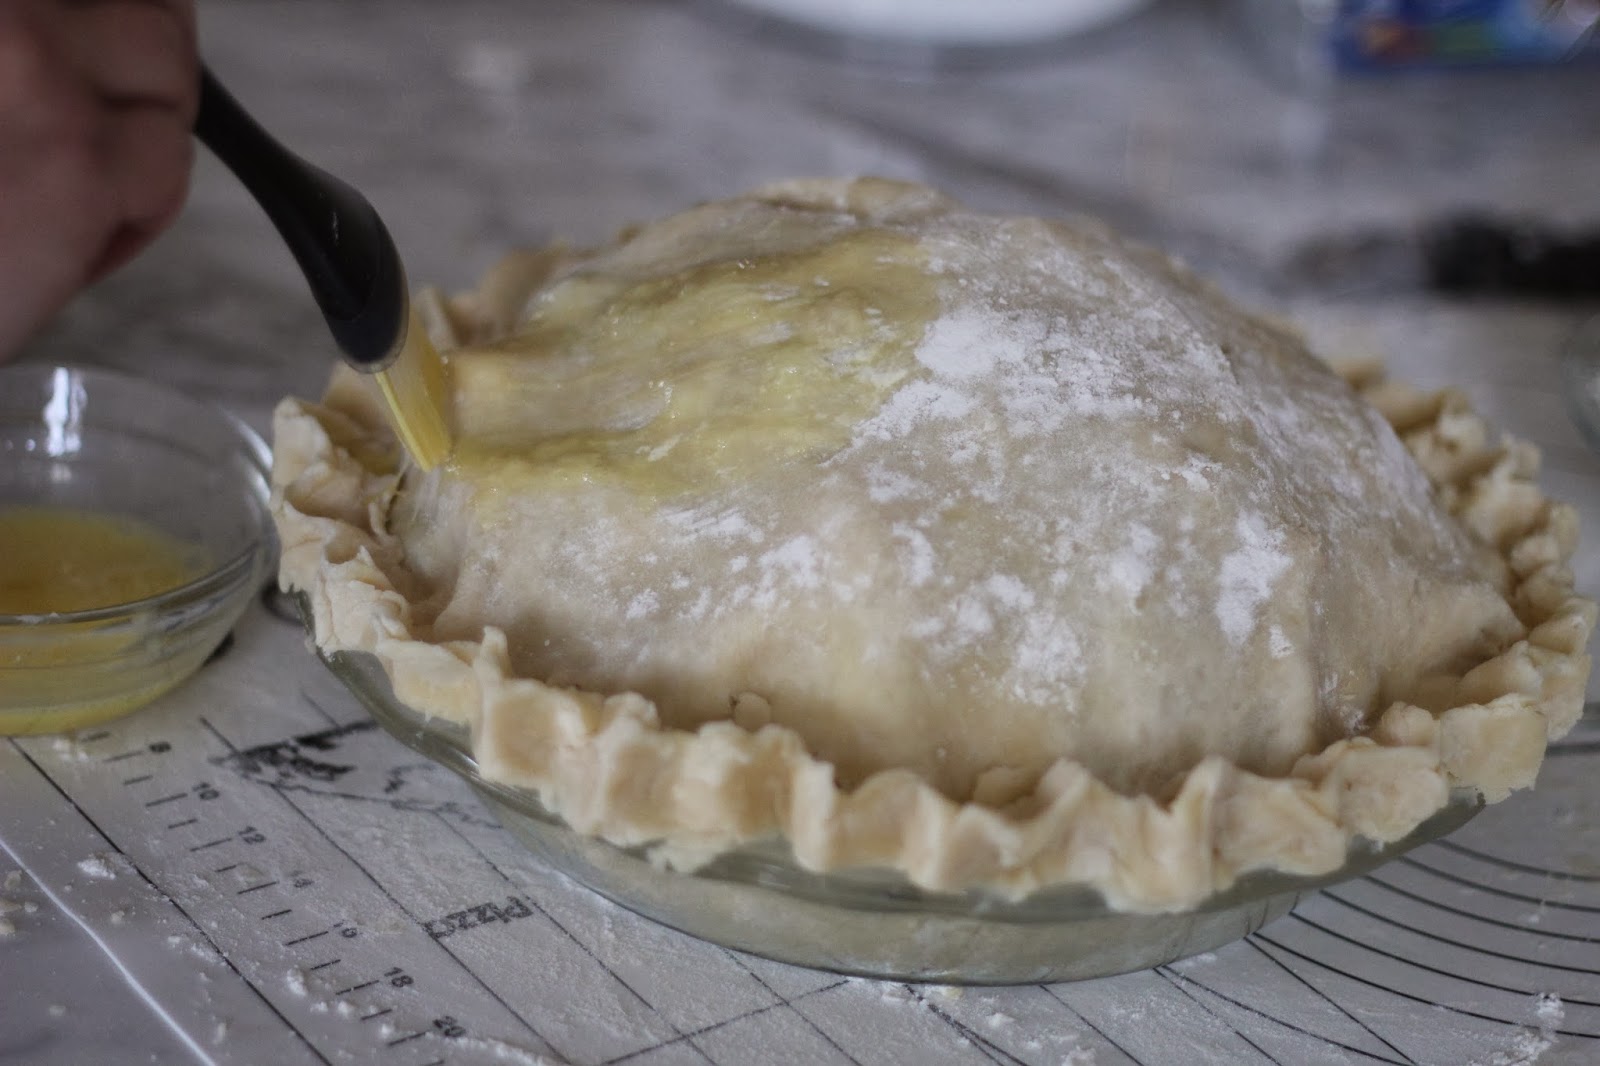
roll the dough to about 1/4 inch thick
make sure there is plenty of flour on the surface, or the dough will stick

cut out shapes with cookie cutter

remember that part about generously flouring surface?
if you don't flour the surface enough,
you may need to use a spatula to get the cookie shapes into the baking pan
cookies from the bakery, cut by machine

dough ready to set on pan and bake


After baking, remove from oven and let cool completely.
Ready for the glaze?
Make the glaze according to recipe and fill the mini trough with glaze. Double the glaze recipe if you are using the trough, so you will have enough glaze to cover all of the cookies.

line a baking pan with a clean sheet of parchment paper
set the cookies on top of a cooling rack that will fit into a baking pan

This is the method Curt uses to cover all of the cookies at one time.
Thanks Corrine, for making this Gif file, so we can watch it over and over and over.


isn't this a thing of beauty? 
say yes


If you don't want to purchase a spackle pan, you can simply mix up the glaze in a bowl, then dip the cookie and gently scrape the excess icing off before setting it on a pan to set up. The next few photos show us dipping the cookies in the glaze by hand.

dip the cookie into the glaze, let the excess glaze drip back into the container

using  a butter knife, scrape off any excess icing back into container

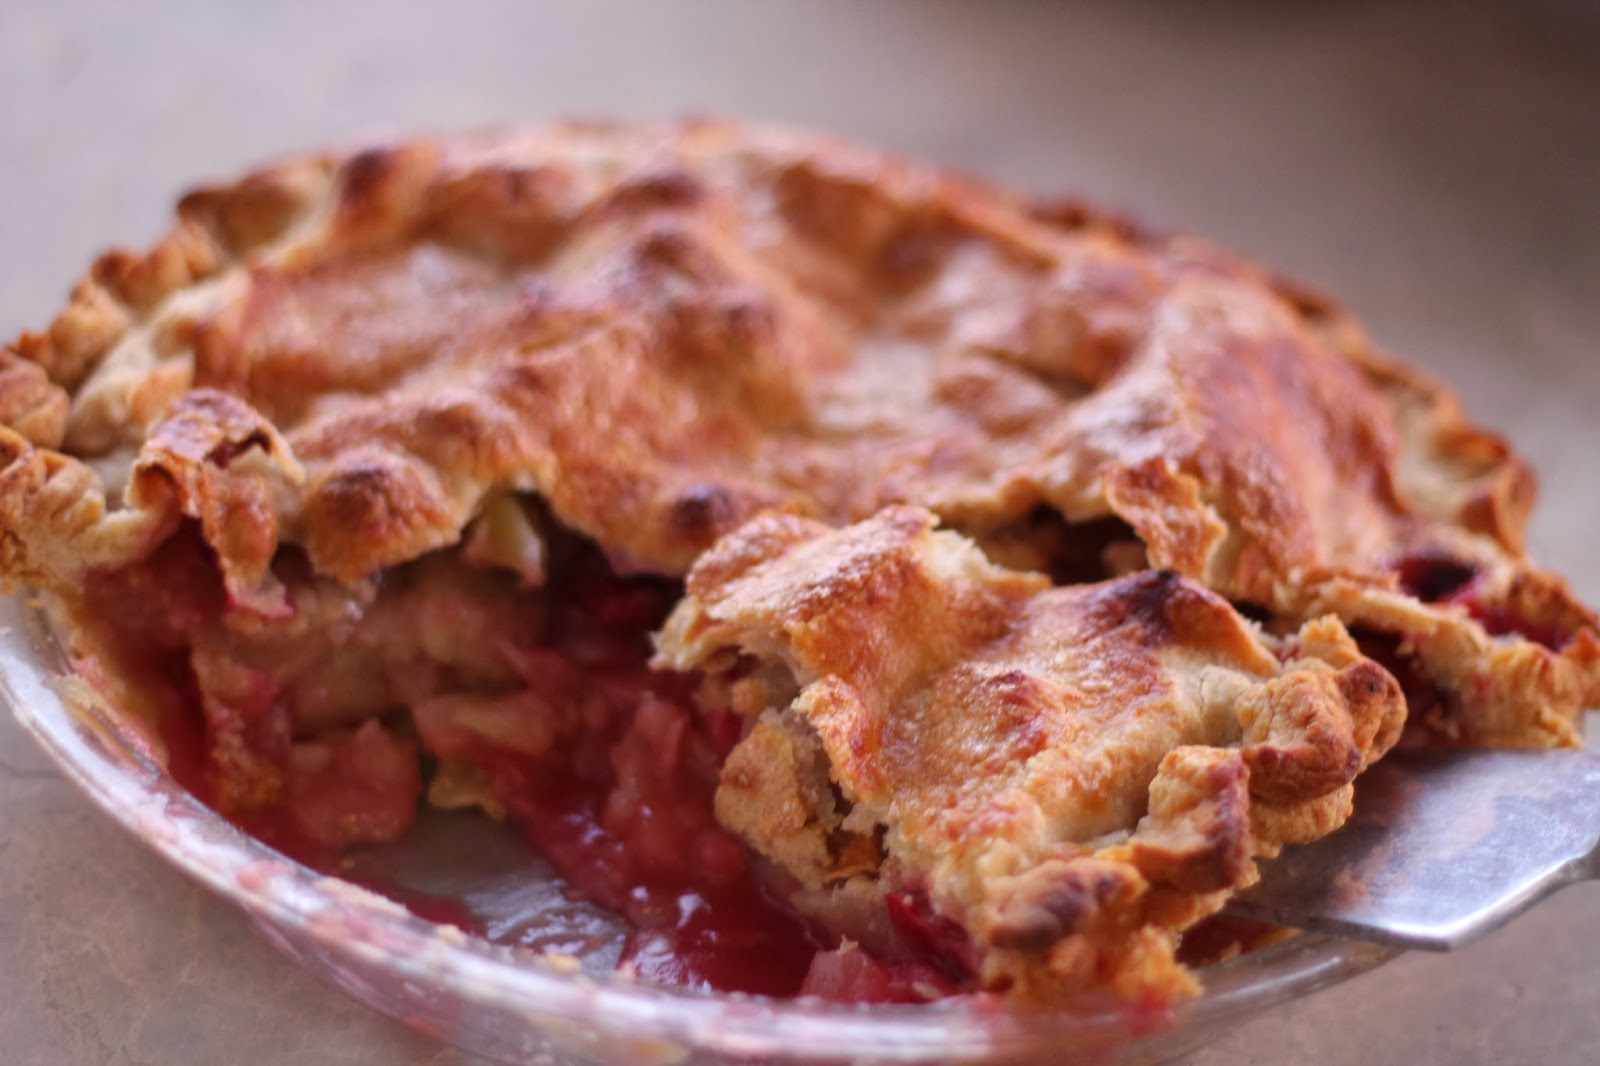
one beautiful glazed cookie

essential ingredients
hurry and throw on some sprinkles before the glaze dries!


That's it! Very simple, really. With or without the mini trough.
Of course, the easiest way to enjoy a Cutler's Cookie is to hop in the car and drive over to Cutler's and get your cookie fresh from their Bakery. Call them to place your order early (801) 298-2253. Valentine's Day is one of their busiest days of the year. Curt and crew sell about 300 dozen (3,600!)  heart shaped cookies the week of Valentine's, not counting the pink frosted or other cookies sold there. Baking frenzy on 500 South.
Hope your Valentines Day is filled with all things sweet!


Cutler's Famous Glazed Sugar Cookies
Cutler's Cookies, Bountiful Utah

1 1/2 cups butter (3 sticks)

2 cups sugar

3 eggs

2 teaspoons vanilla

2 teaspoons baking powder

1/2 teaspoon salt

5 cups cake flour
glaze ingredients (below)
sprinkles for topping cookies
parchment paper (optional)


Cream butter and sugar. Add eggs and vanilla and mix until blended well. Add dry ingredients and mix. To make dough easier to work with, chill before rolling.
Generously flour surface.
Roll dough on floured surface to about 1/4 inch thick. Cut cookies and bake at 350 for 10 minutes. 

Cookies are done when top is slightly cracked and no longer looks wet. Edges may be slightly browned.

Top the cookies with glaze. 

Makes about 2 1/2 to 3 dozen, depending on the size of your cookie cutter.


Cutler's Glaze
Single recipe is fine if you are dipping the cookies. If you are pouring out of the trough, double this to insure you will have enough to pour out of pan and cover all cookies


4 cups powdered sugar

1/2 teaspoon almond emulsion* or almond extract

1/2 teaspoon meringue powder**

milk or water to thin (Curt prefers milk) about 1/2 cup
milk will make a thicker glaze, water a thinner glaze

Place powdered sugar in a large bowl. Add almond emulsion or almond extract to the powdered sugar, along with milk or water, a little at a time whisking to combine. Continue whisking until smooth. Add just enough water to make a smooth glaze that stays on a knife when the knife is dipped in the glaze.
Glaze the cookies by dipping the cookie into the glaze in a bowl and removing quickly when coated.
Place cookies on rack or cookie sheet until glaze sets.

Tips:
-*almond emulsion is sold at specialty cooking stores (Orson Gygi's in Salt Lake City) or stores where cake decorating supplies are sold. You may also use almond extract. 
-** Meringue powder is also sold at specialty cooking stores. Cutler's uses meringue powder to create a shiny effect on their glaze. It is optional when making the glaze. Or you may use the same amount of cream of tartar in place of the meringue powder to create the shiny effect. I have noticed the shiniest effect seems to come when using the combo of water and meringue powder in the glaze.
-If the glaze starts to get too stiff, add a small amount of water and whisk in until desired consistency. I mixed up the glaze, then poured it into a pie plate so we could easily dip the cookies that are covered in white glaze in the photos above. 
-The hot pink color is achieved through using a food coloring purchased through Michaels or (in Utah) at Orson Gygi.
-Make sure to use a clean sheet of parchment paper in the bottom of the pan used to glaze the cookies. if you are using the trough method. After you are finished pouring the glaze over the cookies, you may scrape the excess glaze back into a container and use the icing for a future batch of cookies. Refrigerate any leftover glaze. 

clean up crew


12/16/13

Homemade Oreos and ABK's 4th Annual Christmas Cookie Extravaganza


Fourth year in a row. Christmas cookie week  at ABK.
Day one. Homemade Oreos. I started with this recipe because I wanted to share an easy kid-friendly cookie. Christmas is steeped in tradition. Sometimes, we get into a rut with traditional baking.  We bake certain cookies because they have been handed down through generations. Those "I have to make these every year or it won't be Christmas" recipes. Lots of times they are loaded with nuts and fruits and who knows what else... My kids were never big on the fruit and nut cookies. After making Date Pinwheels (which I loved) for about 15 years, I noticed there were always lots of leftovers which I reluctantly tossed in the trash after January 1st.  I finally stopped making those lovely date cookies, and my kids have never peeped a word about the missing "must have" cookies.
I try to include a chocolate cookie in our Christmas baking each year, this year, it's the humble Homemade Oreo. Out with dates, in with chocolate.
Happy Baking.
Next up: Jolene's Linzer Cookies


Homemade Oreos
adapted from Sweet Potato Chronicles
print recipe

cookies:
1 1/4 cups all-purpose flour
1/2 cup unsweet­ened Dutch process cocoa
1 tea­spoon bak­ing soda
1/4 tea­spoon bak­ing pow­der
1/4 tea­spoon salt
1 cup sugar
1/2 cup plus 2 tablespoons room-temperature, unsalted but­ter
1 large egg

fill­ing:
1/4 cup room-temperature, unsalted but­ter
1/4 cup veg­etable short­en­ing
2 cups powdered sugar
1 tea­spoon vanilla extract

Pre­heat oven to 375°F.
In a food proces­sor, or bowl of an elec­tric mixer, thor­oughly mix the flour, cocoa, bak­ing soda and pow­der, salt, and sugar. While puls­ing, or on low speed, add the but­ter, and then the egg. Con­tinue pro­cess­ing or mix­ing until dough comes together in a mass.
Take rounded tea­spoons of bat­ter and place on a parch­ment paper-lined bak­ing sheet approx­i­mately two inches apart. I used a mini scooper to form the cookies. Make sure to follow directions here, or you'll end up with cookies that are way too big. With moist­ened hands, slightly flat­ten the dough. Bake for 9 min­utes, rotat­ing once for even bak­ing. Cool completely.
To make the cream filling,  place but­ter and short­en­ing in a mix­ing bowl, and at low speed, grad­u­ally beat in the sugar and vanilla. Turn the mixer on high and beat for 2 to 3 min­utes until fill­ing is light and fluffy.
To assem­ble the cook­ies spread a bit of the filling onto the bottom of the cookie (flat side).  You may use a pas­try bag with a 1/2 inch, round tip, to fill the cookies, but I think spreading the filling on works just as well.  Place another cookie, equal in size to the first, on top of the cream. Con­tinue until all of the cookies have been sand­wiched with cream. Store in a sealed container. 
Makes about 25-30 small (about 3 inch) cookies.

11/25/13

Perfect Apple Pie & Step-by-Step Tutorial


Are you ready for this week? The week of thanks, family, friends, food, football, and P I E .
If you've never tackled pie, but want to try, I have a little tutorial for you. A step-by-step with photos to help you along (printable recipe at bottom of photos). I taught two pie classes in the last couple of weeks and have had people who have never made a pie in their lives report back and tell me they went home and baked a pie that their family LOVED. Two teenage girls in my neighborhood came to a class, and then had their mother take them to the store to buy apples so they could bake a pie. Yes, two teenage girls baked an apple pie. Successfully. Without using store bought crust. Hooray for home cooking!
You can do this.
The best apple pie in the world.
You know you want it.
 Let's get started.


Not my oven, but don't you just love a  turquoise oven?

Step one.
Get your oven ready:
Move the rack to the bottom third of the oven (usually the second to bottom shelf) and turn the oven on to 375 degrees.  I have been baking pies on the bottom shelf, or close to it, for years now. It insures the bottom crust is nicely browned and the top crust does not get over browned. The exception to this is if you have an oven like I now have (Wolf)  that has a special setting just for baking pies. In this case, leave the rack in the middle and use the convection bake (not convection, convection bake) setting, made especially for pie baking. Don't be jelly. I'm not all that impressed with this oven. I'd trade my old GE's for these in a heartbeat. That's a story for another post.
OK, back to our happy pie making toots.
Oh, and thanks in advance to Robilyn and Angie, who allowed me to photograph their pie making experience :) You'll see their pies and lovely hands in the photos to follow...


First, get yourself an apple-peeler-corer-slicer . Sold at most hardware stores. Also sold at kitchen stores. I've owned a couple. I like the type that suction to your counter top the best. Wet the counter a bit with a slightly damp cloth, then attach the peeler. If you can't get your hands on one of these, peel and core with a paring knife, slice the apples into about 1/4 inch thick slices.  Believe me, if you can spare the $25 it's the best money you'll ever spend. OK, maybe not the best money, but it will make you love me every time you make an apple pie. Oh, and buy apples that are uniform in size, it will make the peeling experience quick and easy. And refrigerate your apples. That helps them hold their shape while peeling. Take the peeled, sliced cored apple and cut it in half. Trim off any bits of seed or core that may be left inside of the apple.


Place the apples into a large bowl. Pour all of the dry filling ingredients for the pies on top of the apples but do not mix up yet. If you mix the sugar with the apples and are not immediately ready to pour the filling into the pie crust, the sugar will bring out the juices in the apples and cause the apples to  macerate and produce more juice than you may want sitting in your crust. If you are making an apple cranberry pie, add the raw cranberries and make the necessary adjustments in the recipe as well.
For our tutorial, we are making apple cranberry pies.


For the fat, I prefer shortening. I use Crisco, half regular and half butter flavor. I've experimented with butter but not had the result that I'm looking for, which is a light flaky crust. Trust me on this. I like to use the sticks because they are so convenient, and no messy measuring shortening into cups. I do not refrigerate my shortening, but if you feel inclined, chill away.


Measure the flour into a large bowl, plop the shortening in, along with the salt. 


Cut the shortening into the flour and salt. I usually use a pastry cutter, but two knives will work just as well. Cut the shortening by placing a table knife in each hand, blades down. Now, place your fists together and pull the knives across the bowl in a cutting motion. This is way more difficult to explain than it is to execute. This step takes about one minute, or less.  When you are out buying the apple-peeler-corer-slicer,  get yourself  a pastry cutter. Look it up. Very inexpensive. I'm sure you can get one at the $1 store.


After you take twenty minutes to figure out what I was trying to tell you in the last paragraph, your dough should look like this.  Go back and re-read that last sentence. I didn't say it should take 20 minutes to cut the shortening and flour together, just that figuring out my directions might take that long. Isn't this helpful?
You want to have little pea-like size pieces of dough. The little pieces of shortening in the dough are  what creates the air pockets in the crust, therefore producing a flaky crust. Pour the cold water into the dough all at once. Then mix the dough gently with a fork. I fold more than mix. Do not over mix. This should take about 10 seconds. The dough should come together with a few loose bits of flour and dough in the bowl. When you gather all of the dough together, the pieces should stick together. If not, add a tablespoon or so more of cold water. Do not knead. Do not mix. just pat together.


Flour the surface you are using generously. I use about 1/3 to 1/2 cup of flour to prepare the surface.


Divide the dough in half if you are making a two crust fruit filled pie. I place a little more dough in the half that is covering the bottom of the pie plate. Gently shape the dough into a round disc. Start to roll out the dough evenly, not pressing down too hard on the rolling pin. Roll the dough into a circular shape. No worry if the circle is not perfect. Lift the dough occasionally and add more flour to the surface if the dough starts to stick. Also flour the rolling pin if needed. I do not advise flipping the dough,  less is more when handling the dough for pie crust. Think tender, flaky. What? You were thinking other words? Shame on you.


Now, take the pie plate you are using and place it upside down on the rolled out dough. You want to have about a two to three inch overhang, so when you place the dough in the plate, there is plenty of dough to fill the plate and hang over to make sure the pie seals properly.  Set the plate aside.


Take half of the dough and fold it over onto the other half like this. Some people like to then fold it again in quarters, but I usually just do halfsies.


Gently lift the dough onto the pie plate, so the dough covers half of the plate.


Take the folded portion of the dough and unfold it onto the plate. Don't stress if it tears, just pat it back together.


Ta dah!


Now, remember the apples we prepared earlier? Mix the dry ingredients into the apples and dump the apple filling into the pie plate.  See how the crust is not perfectly arranged on the plate, no big deal. We will take care of that when we seal and crimp. See the bits of peel on the apples? Also not a big deal. If this stresses you out, take a paring knife and remove every single last bit of peel. Now, that's better.


The fruit will settle when you bake the pie, so pile the fruit up high.


Dot the fruit with butter, and sprinkle the vanilla and/or almond extract on because everything is better with butter, right?


Roll out the dough for the top crust, same as you did for the bottom layer. 


Fold it in half and transfer onto the filled pie, then unfold so the whole top of the pie is covered.  Say goodbye to the filling. Go ahead say it. "Bye-bye see you after baking!" I always do this. not really.
If for some reason, your dough tears, don't worry, just gently pinch it back together, or wait until we make slits in the pie and strategically place your slits by the tear. Or cover them with dough cutouts. I have yet to make a pie with an imperfect crust and have someone point at the pie and say "Sheesh, your crust is imperfect, I don't think I want a piece of this pie.".


Gather the edges (didn't get a good photo of this step). I like to fold the layer of dough underneath upward, so it gathers and folds over onto the top layer of dough. If you are short on dough to fold over, take some dough from another area where there is extra and press it together where you have a shortage. Start to crimp and seal the edge. You can use a fork to press the dough down and make a little crimped edge with the end of the fork tines, or get a little more fancy and pinch the dough between your thumb and forefinger on one hand and forefinger on the other hand to make a nice little pointy edge. I believe this is Robilyn, who btw, was making her first apple pie. She's an expert crimper now.


I like to beat an egg and wash the top of the crust. You may use cream, or milk, or just a beaten egg white. Brush the whole top of the crust with the wash.


Sprinkle with granulated sugar. 


Make a few slits in the top crust for steam to escape. Any design will do. 


Place the pie on a sheet of foil or a thin cookie sheet. I like to use foil so it catches any excess juices from the pie, then I can simply throw away the foil after baking.  Place the pie in the hot oven and bake as directed on the recipe. After the pie is about half way through baking place a sheet of foil loosely on top of the pie to prevent over browning. How do you know it's done? People laugh when I say this, but you can smell it. It has a certain aroma when the apples and crust are done. Or just set the timer, It should be done in 1 hour and ten minutes, give or take a few.


In a short while, you'll be pulling this out of your oven. The crust on the bottom should be golden as well as the crust on top. After removing from oven, make sure to allow enough time to let the pie cool properly. It took years of baking to realize I wasn't allowing enough cooling time.  If you don't allow at least two and even better three to four hours for the juices to set up in the pie, your pie will be runny when you cut into it. After three hours, it will usually still be warm. This pie was cut about four hours after coming out of the oven...


There you have it. Everything you ever wanted to know about making an apple pie. And then some. Hope this inspires you to bake one this holiday season.
Happy baking!
loves,
Si


Print all three recipes here


Best Basic Flaky Pie Crust
A Bountiful Kitchen

2 cups flour
1 teaspoon salt
1 cup shortening
½ cup very cold water

Mix flour and salt. Cut in shortening with pastry blender or knives. Add water.
Fold with fork until flour is absorbed and dough comes together. Flour surface and rolling pin well. Flatten dough gently with hand to make round shape. Roll out from center to about 1/8” thickness. Fold in half, lift onto pie plate. Open and shape to pan.

Tips:
-Dough may be easier to handle if chilled for an hour or so.
-Try rolling the dough around the rolling pin and then unrolling right onto the plate.
-Try ½ regular and ½ butter flavor Crisco.
-Some people like to “cut” the flour in with their fingers.
-Don’t cut the flour and shortening too much, the pieces of shortening are what make the crust flaky, you want to have pebble size pieces of dough before adding the water.
-If your pie is getting too brown on the edges, but not on top, take a piece of foil, fold in half to make a square then cut a half circle out of the middle. Unfold and put over your pie.
-Brush beaten egg white over your pie dough before filling with pumpkin to avoid soggy bottom crust.
-If baking for a single cooked crust, prick the entire bottom crust with a fork (to allow steam to escape). Set the oven to 500 and bake for about 6-10 minutes on the middle rack, watching carefully to insure the crust doesn't burn. Remove the crust when done and let cool, then fill with custard or other filling.
This is for a single cooked crust only. Do not prick the bottom of the crust when baking a filled single crust pie (such as pumpkin or pecan).

Fresh Apple Cranberry Pie
A Bountiful Kitchen

6-7 apples any type, peeled, cored and sliced ( I like Granny Smith)
1 1/2 cups fresh cranberries, washed
1 1/4 cups sugar
1/2 cup flour
1 teaspoon cinnamon
1-2 teaspoons almond extract
juice from 1/2 of a lemon (about 2 tablespoons) not necessary if using Granny Smith Apples
dash salt

Preheat oven to 375 degrees. Place rack on bottom third of oven.
Prepare crust. Roll out bottom crust, place in pie plate.
Place apples in large bowl and mix with cranberries. Add rest of filling ingredients.
Fill bottom crust with apple cranberry mixture. Place other half of rolled out dough on top of filling in pie plate. Crimp edges. Make slits on top of pie for steam to escape. Brush with egg wash if desired, sprinkle with 2 tablespoons sugar.
Place pie onto foil lined cookie sheet or sheet of foil (important, this usually bubbles over a bit).
Bake for about 60 minutes. Cover loosely with foil if pie is getting too brown.
Continue baking for about 10-15 minutes or until pie is bubbly and golden. Total baking time is usually 1 hour and 10 minutes, but may vary in your oven.

Mom's Favorite Apple Pie

6-8 large apples -I like a mixture of Granny Smith and Jonathan's
¾ cup sugar
1-2 teaspoon cinnamon
1 teaspoon nutmeg
½ teaspoon salt
4 tablespoons flour
1 tablespoon lemon juice
2 teaspoon vanilla extract
Butter
Egg, sugar, cream for top crust

Peel, core and slice apples. Set in large bowl. Mix in sugar, spices, flour, and lemon juice. Place pastry in a 9 inch pie plate. Sprinkle with vanilla . Dot with butter. Top with crust. Crimp edges. Cut steam vents. Brush either beaten egg or egg white, sprinkle with sugar or brush with cream or milk and sprinkle with sugar. Bake at 375 for about 50-60 minutes. May need to cover with foil for half of baking time.