Showing posts with label mint. Show all posts

9/5/12

Mango-Peach Tango


Hooray, our plums are finally ripe!  I found this recipe in the August Southern Living Magazine and thought it would be a perfect way to use up some of our fruit. We served it with Honey Lime Enchiladas.
Everyone at dinner agreed- it's a keeper.


Mango-Peach Tango
Southern Living Magazine, August 2012
print recipe

1/4 cup fresh lime juice
3 tablespoons sugar
1 tablespoon seeded and minced jalapeño pepper
2 mangoes, peeled and chopped
3 large peaches, peeled and chopped
3 cups chopped plums
1-2 tablespoon chopped fresh mint
1-2 tablespoon chopped fresh cilantro

Stir together first 3 ingredients in a large bowl until sugar dissolves.
Add mangoes and next 4 ingredients, tossing to coat.
Cover and chill 2 to 6 hours.

Tips:
-I made this immediately before serving, chilling for 2-6 hours is not necessary, but allows flavors to blend.
-You may slice or chop the fruit, I preferred it chopped.

12/7/10

Chocolate Sandwich Candy Cane Cookies


The snow is finally melting, spring is coming...WAIT, it's only December??

This was the view out our back door, the Sunday after Thanksgiving.


The snow started a little early this year, and came in a big sha-bang. Cold weather and snow or rain always compels me to bake. Let's be honest, I'm always compelled to bake. Even when it's 106 degrees. Isn't this why we have AC???
Christmas time sends me in to a bit of a baking frenzy. I used to bake INSANE amounts of treats between Thanksgiving and Christmas. I've toned that down over the years. Now, I mostly bake for our family. Things we love. Trying a few new recipes mixed with tried and true favorites makes us all happy. For the next few days, I'll post a mixture of both.
This recipe is a new one- to me. I loved the way the pink frosting rolled in candy canes looked against the dark chocolate cookies. Wouldn't these look great in a cello bag with a pretty ribbon? Yum.


This photo
makes me
smile.
The cookie
on the right
looks like
it has been banished
from the
leaning tower
of cookies.


Chocolate Candy Cane Cookies
Bon Appétit December 2005
print recipe

Yield: Makes about 18-30 sandwich cookies,
depending on size of cookie scoop

Cookies
1 3/4 cups all purpose flour
1/2 cup unsweetened cocoa powder (preferably Dutch-process)
1/4 teaspoon salt
1 cup sugar
3/4 cup (1 1/2 sticks) unsalted butter, room temperature
1 large egg
2 tablespoons milk (if needed)*

Filling
1 cup plus 2 tablespoons powdered sugar
3/4 cup (1 1/2 sticks) unsalted butter, room temperature
3/4 teaspoon peppermint extract ( I used about 1/4 tsp)
2 drops (or more) red food coloring

1/2 cup crushed red-and-white-striped candy canes or hard peppermint candies (about 4 ounces)

For cookies:
Whisk flour, cocoa, and salt in medium bowl to blend. Using electric mixer, beat sugar and butter in large bowl until well blended. Beat in egg. Add dry ingredients; beat until blended. Add milk if needed to make dough soft.
Refrigerate dough 1 hour.
Preheat oven to 350°F. Line 2 baking sheets with parchment paper. Scoop out dough by level tablespoonfuls, then roll into smooth balls. Place balls on prepared baking sheets, spacing about 2 inches apart. Using bottom of glass or hands, flatten each ball to 2-inch round (edges will crack). Bake until cookies no longer look wet and small indentation appears when tops of cookies are lightly touched with fingers, about 11 minutes (do not over bake or cookies will become too crisp). Cool on sheet 5 minutes. Transfer chocolate cookies to racks and cool completely.

For filling:
Using electric mixer, beat powdered sugar and butter in medium bowl until well blended. Add peppermint extract and 2 drops food coloring. Beat until light pink and well blended, adding more food coloring by dropfuls if darker pink color is desired. Spread 2 generous teaspoons filling evenly over flat side of 1 cookie to edges; top with another cookie, flat side down, pressing gently to adhere. Repeat with remaining cookies and peppermint filling.
Place crushed candy canes on plate. Roll edges of cookie sandwiches in crushed candies (candies will adhere to filling). Cookie sandwiches can be made ahead. Store in single layer in airtight container at room temperature up to 3 days or freeze up to 2 weeks.

Tips:
-*Our climate is really dry, so I needed to add the 2 tablespoons of milk to make the dough pliable. After reading reviews on the Epicurious site, other readers had the same problem.
I'm sure water would also work as an acceptable alternative.
-The cookies are very sweet and rich, so I used a 1" cookie scoop and made small cookies.

10/22/09

Pinch of Salt Lake Mint Brownies


My cute friend Erin had a beautiful baby a while ago, and I promised her some mint brownies in exchange for the baby. At least I thought that was the deal. You know I don't love mint, but I did try one, before I delivered the goods and I must say even to me, a mint basher, they were delicious. I go light on the mint, so there is just a hint of mint in the filling. If you are into cutesy, you could make these for a baby shower and color the mint filling either green or pink (gag) . I'm not into food coloring either. For some unknown reason, I really hate it when mint flavored food items are colored green, or when Key Lime Pie is colored green. Hello, people, that does not make the food more appetizing. Don't you love it when someone addresses you as "people". Takes me back to jr. high. Another one of my favorites.
Right up there with mint.


Pinch of Salt Lake Mint Brownies
print recipe

Brownies:
2 cups sugar
1 cup butter, softened
4 eggs
4-1 oz squares unsweetened chocolate, melted and cooled slightly
2 1/2 cups sifted flour
1/4 teaspoons salt
1/4 teaspoon baking powder
2 teaspoons vanilla extract


Mint filling:
4 tablespoons butter, softened
2 tablespoons evaporated milk, (half and half or cream works too)
2 cups powdered sugar
1/2 teaspoons peppermint extract
few drops of pink or green food coloring, if desired

Glaze topping:
3 tablespoons butter
2 teaspoons vanilla
1 cup semi sweet chocolate chips

Preheat oven to 325 degrees. In a large bowl, cream together sugar and butter and beat until fluffy. Beat in eggs until well blended; then add melted chocolate. Sift flour, measure out 2 1/2 cups and sift again with dry ingredients then add to creamed mixture along with vanilla. Spread in greased and floured 9x13 pan and bake for about 25 minutes or until toothpick inserted in center comes out with a few crumbs attached. Do not over bake. Set aside and let cool.
Mix all frosting ingredients until creamy and spread on brownies. Refrigerate 1 hour.
Combine butter and chocolate chips in top of double boiler; add vanilla and blend thoroughly. Pour gently over frosting and spread by tipping pan until all of the brownie mixture is covered with glaze. Refrigerate until set.

Tips:
-I left out the 1 cup of nuts in this recipe, because if there is anything more weird than green food coloring in the mint filling, it's nuts in mint brownies. For some reason mint and nuts just don't go together in my world. So- 2 1/2 cups of flour may seem like a lot, but due to the absence of the nuts, I left in the full amount of flour. Remember- don't over bake.

Mints on Foodista

7/31/09

Oreo Andes Mint Ice Cream


Mint. I have a love/hate relationship with it. Mint brownies, ice cream, cookies, candies, all of those desserts served at church functions with crushed peppermint, or pink peppermint ice cream ICK (at holiday time)...never a temptation. My mom didn't like mint, so she never served it. I could go my whole life without mint, without a second thought.Until a couple of years ago. I tasted a really yummy scoop of mint ice cream, and for some unknown reason, it triggered an intense (about once a year) craving for chocolate and mint. Uh Huh. Thin Mints. You know- Girl Scout cookies. Why would anyone love or crave those waxy, thin, chocolate covered cookies?? I have no idea....A few weeks ago, I handed some friends my trusty Ben and Jerry's Homemade Ice Cream and Dessert book.
"Choose a flavor", I said.
"Really, you want Oreo MINT?"
OK. How bad could it be, I mean, it had cookies in it.


It was yummy. Creamy. A little minty. Chocolaty. Oreos are probably my favorite store bought cookie of all time. Oh my word. This flavor is beyond delish. I thought adding Andes Mints put this recipe over the top. You are going to love/hate it.


Oreo Andes Mint Ice Cream

1 cup coarsely chopped Oreo cookies
1/2 cup Andes chocolate mints, chopped (optional)
2 large eggs
3/4 cup sugar
2 cups heavy or whipping cream
1 cup whole milk
2 teaspoons mint extract ( I used 1 1/2)

Place cookies in bowl, cover and refrigerate.
Whisk the eggs in a mixing bowl until light and fluffy 1-2 minutes. Whisk in sugar a little at a time, then continue whisking until completely blended, about 1 minute. Pour in the cream and milk and whisk to blend. Add the peppermint extract and blend again.
Transfer the mixture to an ice cream maker and freeze following manufacturer's directions.
After the ice cream stiffens (about 2 minutes before it is done), add the chopped cookies and mints (if using), then continue freezing until the ice cream is ready. Makes generous 1 quart.

Tips:
-With regard to the amount of extract- My friend Leeanne says " In the world of extract, a little goes a long way." Profound. Especially with mint.
-Best to wait and add the cookies right before serving.

2/2/09

Chocolate Peppermint Cookies


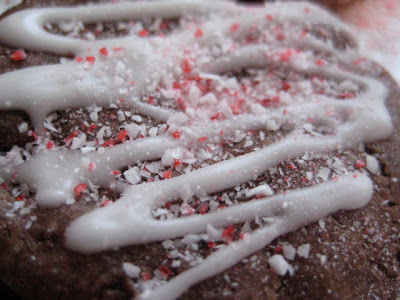
It's officially the Month of Love. Chocolate=love in my home. I found this recipe a few years back when I subscribed to Food Network's 12 days of Cookies (Christmas time tradition). They send a new cookie recipe for 12 days in a row in November. In the 3 or 4 years I have subscribed, this is the only keeper recipe. Choc Peppermint Cookies are a little like a brownie/cookie. I'm not a big mint lover, so I go easy on the mint extract. You could always leave the mint flavoring out too. It's only in the glaze. During the holidays we added the sprinkles to make them a little more festive. A bunch of these in a really cute box from a craft store with pretty pink or red ribbon would make a great inexpensive treat for your Valentine. What gift is better than a home made one?? This comment applies only to female gift giving readers.


Chocolate Peppermint Cookies
Food Network

Cookies:
2 ¼ cups all-purpose flour
3/4 cups unsweetened cocoa powder
1 teaspoon baking soda
1/4 teaspoon salt
1 cup (2 sticks) unsalted butter, room temperature
1 cup packed light brown sugar
3/4 cup sugar
2 eggs
2 teaspoons vanilla extract
2 cups semi sweet chocolate chips (regular or mini’s)

Glaze:
3/4 cup confectioners sugar
2 drops mint extract, or more to taste
3 1/2 teaspoons half and half or milk

For the cookies:

Preheat oven to 350 degrees F. I use the convection bake setting. If you are not using convection, you may have to bake these for a total of about 10-12 minutes or until barely set*.

In a medium bowl sift together flour, cocoa powder, baking soda and salt. Set aside. In a mixer beat together the butter with the sugars until fluffy, about 2 minutes. Add eggs 1 at a time, beating until smooth after each addition and scraping the sides of the bowl as necessary. Add vanilla. On a low speed beat in the flour mixture a little at a time. Gently mix in chocolate chips.

On an ungreased cookie sheet, drop teaspoons of the batter about 2 inches apart. Bake until just cracked on top, about 8 minutes, rotating the pan halfway through the cooking time. Flatten the cookies slightly with a spatula after removing from oven. Cool completely.

For the glaze:
In a small bowl mix together the sugar; mint extract and milk until smooth. Transfer mixture to a medium resealable plastic bag and snip off a tiny bit of the corner. Drizzle glaze over cooled cookies. Let cookies stand until set, about 10-20 minutes.

If desired, before glaze sets, sprinkle with chopped mint candy.

Tips:
-I add the dry ingredients all at once, with the chocolate chips. I do this on all chocolate chip cookies, it helps keep the chocolate from sinking to the bottom of the cookie.
-*Do not over bake. Let the cookies cool completely before glazing. They will continue to cook and set up after you remove from the oven.